
Syed Anas Hussain
May 25, 2026 • Updated July 21, 2026
11 mins Read
The gap between a script and a shoot is where most film problems are created. A scene that reads clearly on the page produces an unclear camera plan on the day. A location that seemed right in the writer's imagination turns out to be wrong for the lens choices the director needs. A movement sequence that was never tested produces an edit that doesn't work. The process of previsualization in film exists to close that gap to make the invisible decisions visible before they become expensive mistakes.
What Is the Process of Previsualization in Film?
Previsualization in film a.k.a "pre-viz" is the process of creating a visual representation of planned scenes before physical production begins. Rather than attempting to resolve all visual decisions on set, pre-viz moves those decisions into pre-production, where changing direction costs time on a sketchpad rather than time with a crew.
The output of pre-viz can take many forms: rough storyboards, animatics (moving storyboard sequences), 3D pre-viz renders, or, increasingly, AI-generated video clips. What defines it is not the format but the function - testing visual decisions before committing to production infrastructure.
Previsualization is used at every level of filmmaking. Major studio productions use full 3D pre-viz suites with dedicated teams. Independent filmmakers and commercial directors use storyboards and reference frames. In 2026, AI tools have made meaningful pre-viz accessible to productions at any budget level.
Why the Process of Previsualization in Film Matters
The case for previsualization is economic as much as creative.
Decisions made in pre-viz cost nothing to change. A camera angle that doesn't work can be corrected in a sketch. The same discovery on a shoot day costs the time of every person on set.
Pre-viz surfaces problems that scripts can't. A script describes action and dialogue. It says nothing about whether the planned wide shot actually establishes the spatial relationship the scene needs, or whether the planned coverage gives the editor enough options to cut the scene properly. Previsualization makes those problems visible before production.
It creates a shared visual language for the crew. The DP, production designer, first AD, and actors all work from the same pre-viz references. Instead of translating a verbal description into a visual interpretation, everyone starts from the same reference point.
It speeds up shoot days significantly. A director who has pre-viz'd every scene arrives on set having already made the major creative decisions. The crew time goes toward execution — not exploration.
The Stages of the Previsualization Process
The process of previsualization in film moves through several distinct stages. Not every production uses all of them, but understanding the full sequence helps you identify where pre-viz gives you the most value for your specific project.
Stage 1: Script Breakdown and Beat Identification
Before any visual work begins, the script is broken down scene by scene. The goal is to identify the visual moments — the story beats, emotional turning points, and action sequences — that will require pre-viz work.
Not every scene needs to be pre-viz'd. A straightforward dialogue scene with two characters at a table may need only a quick shot list. A scene with complex blocking, difficult lighting, or unusual camera work is where previsualization investment pays off.
At this stage, the director typically marks the script with notes on visual intent: the emotional register of each scene, the camera approach, the relationship between characters in the space.
Stage 2: Storyboarding
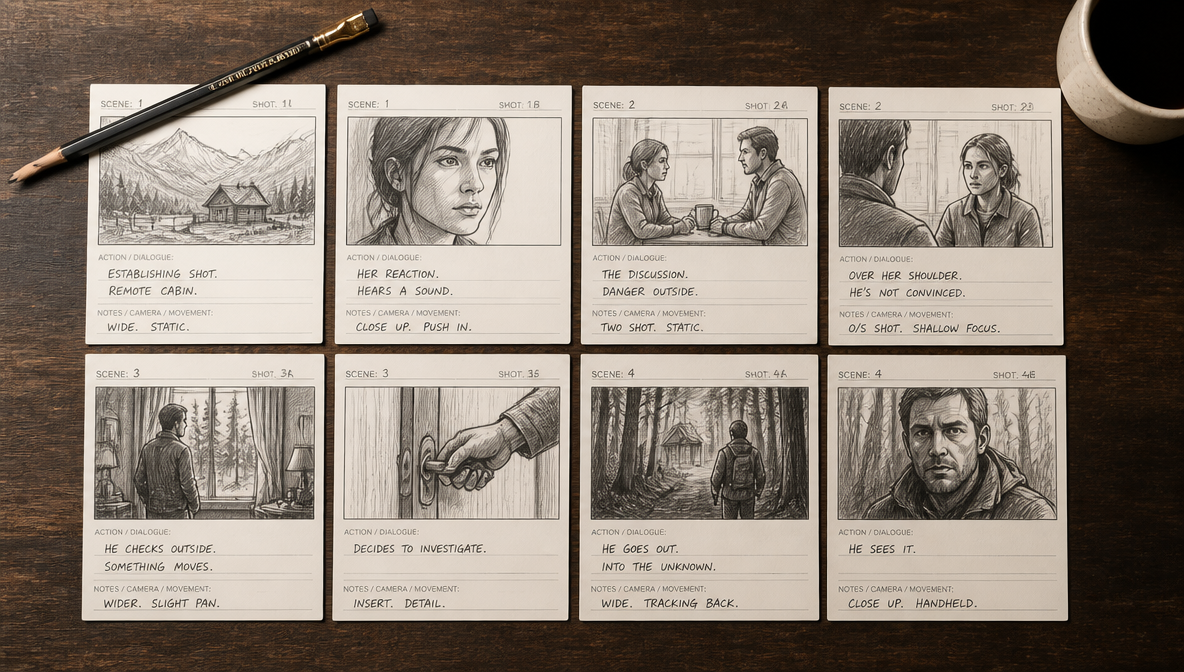
Storyboarding is the most widely used stage of previsualization. Each planned camera setup becomes a drawn or generated frame showing composition, subject positioning, angle, and any camera movement.
The storyboard is not a finished artwork — it is a production map. Stick figures and rough shapes communicate framing as effectively as detailed drawings. What matters is that the spatial and compositional decisions are fixed on paper before the shoot.
For traditional productions, storyboards are hand-drawn or created with dedicated storyboard software. For AI-assisted productions, storyboard frames can be generated from text prompts — producing visual references that communicate cinematographic intent without drawing ability.
The How to Create a Film Storyboard guide covers the full storyboarding process step by step, including how to use ImagineArt Film Studio's Storyboard mode to generate frames without drawing.
A strong storyboard for each scene answers:
- How many distinct camera setups does this scene need?
- What is the primary angle for each beat?
- Where does the camera move, and why?
- What does each frame cut to next, and does that cut work?
Stage 3: Animatics
An animatic is a moving version of the storyboard — the frames edited together in sequence with timing that approximates the final edit. Animatics are used on productions where the rhythm of cutting matters and needs to be tested before the shoot.
For action sequences, musical sequences, or any scene where the pace of cutting is part of the storytelling, animatics reveal problems that static storyboards cannot. A sequence of frames that looks fine as a series of images may feel too slow, too rushed, or rhythmically wrong when put in motion.
Traditional animatics are produced in editing software. AI-generated video clips can function as animatics — generated from storyboard prompts and assembled in sequence to test the visual rhythm of a planned scene. For further reference, review our blog on How to make an AI Short Film.
Stage 4: Technical Pre-Viz (Camera and Lens Testing)
Beyond composition and storytelling, pre-viz covers the technical cinematography decisions that affect how footage looks and behaves. This includes:
Focal length testing. A 24mm lens puts a character inside a visible world. An 85mm isolates them from it. A 100mm compresses distance without telephoto distortion. The right choice for a scene is not always obvious from the script, and the wrong choice is difficult to fix in post.
Depth of field and aperture. How much of the scene should be in focus? A wide aperture at 85mm separates the character cleanly from the background. A narrower aperture keeps the environment visible. For dialogue scenes or interview-style content, aperture determines how much world the audience sees around your subject.
Camera movement and stabilization. Does the scene need a locked-off shot, a smooth dolly move, or the energy of handheld? Each communicates something different to the viewer. Testing movement decisions in pre-viz prevents committing to an approach that doesn't serve the scene. Learn types of camera movement to ensure you know what to do.
In ImagineArt Film Studio, the Camera section in the Image tab accepts these exact cinematographic inputs: Camera type, Lens type, Focal Length, and Aperture. This makes technical pre-viz possible without physical equipment.
Stage 5: Location and Environment Pre-Visualization
For projects involving specific environments — a particular location type, a specific lighting condition, a time of day that is difficult to schedule — pre-viz helps test whether the environment delivers what the scene requires.
The questions pre-viz answers at this stage:
- Does this environment produce the visual quality the scene needs?
- Is the planned lighting achievable at the target time of day?
- Does the scale of the space work for the scene's emotional requirements?
- Are there physical constraints in the location that affect planned angles?
This is a form of pre-qualification that narrows location options before the expensive work of physical scouting begins.
Stage 6: Review and Lock
The final stage of the previsualization process is review — going through the pre-viz output as if you are watching the finished film. The goal is to identify anything that doesn't work: compositions that feel off, sequences that don't cut together, technical decisions that need revision.
Pre-viz that has been reviewed and locked gives the production team a confirmed visual reference. Shoot days proceed with direction, not discovery.
How AI Has Changed the Process of Previsualization in Film
Traditional previsualization had a cost barrier that made it inaccessible to smaller productions. A full storyboard required a storyboard artist — days of work and a significant line item in the budget. A 3D pre-viz suite required a team of technical artists and specialized software. Animatics required an editing setup and the time to produce them.
AI tools have changed this in two significant ways:
Speed. Storyboarding a scene in ImagineArt Film Studio using Storyboard mode takes 15–20 minutes. A traditional storyboard artist requires 2–3 days for the same scene. Testing two Genre and Movement combinations in Film Studio takes 15 minutes. The equivalent as a traditional test shoot takes at least a day. Review the difference between AI Film Studio vs Traditional Production.
Access. Pre-viz that was previously limited to productions with storyboard artists and technical pre-viz teams is now available to any filmmaker with a prompt and an ImagineArt account. The quality ceiling for AI-generated pre-viz frames is high enough to communicate visual intent to a full professional crew.
The result is that the process of previsualization in film — which has always been the right approach for any serious production — is now practically accessible at every budget level. For a full overview of the AI tools available across the production pipeline, the Best AI Tools for Film Production guide covers what each tool leads at.
How to Use ImagineArt Film Studio for Previsualization
ImagineArt AI Film Studio tools map directly to the previsualization stages above.
For storyboarding: Enable Storyboard mode in the Image tab. Set the scene count (up to four frames per sequence), dial in the Camera controls to match your planned lens and aperture, and write a specific prompt for each frame. Generate and review. The output is a set of sequential frames that show how your scene will compose.
For genre and movement testing: Use a generated storyboard frame as a Start Frame in Create Video. Generate under two or three different Genre and Movement combinations and compare the results. This is the equivalent of a test shoot for cinematographic register decisions — completed in minutes instead of a shoot day.
For technical camera testing: The Camera section in the Image tab accepts real cinematographic parameters. Test how different focal lengths affect subject-to-background relationships. Test how aperture settings control depth of field. Confirm technical decisions before committing to equipment rental.
For location pre-visualization: Describe the target environment in a prompt — the location type, lighting condition, time of day, and scale. Generate and evaluate whether the environment produces what the scene requires.
Recommended Read: How to Use ImagineArt AI Film Studio & AI Film Prompts Guide
Previsualization vs Storyboarding: What Is the Difference?
Storyboarding is one stage within the broader process of previsualization in film. Previsualization encompasses everything from script breakdown through technical camera testing and location pre-viz. Storyboarding is the visual representation stage — the most commonly used and most widely understood part of the process, but not the whole of it.
A production can storyboard without doing full pre-viz. But a production that does full pre-viz always includes storyboarding as a core component.
Time Comparison: AI Pre-Viz vs Traditional Methods
| Feature | Traditional Method | ImagineArt Film Studio |
|---|---|---|
| Scene storyboarding | 2–3 days (storyboard artist) | 15–20 minutes |
| Movement testing | Test shoot (1 day minimum) | 15 minutes |
| Lens validation | Commit to equipment rental | 10 minutes |
| Location visualization | Schedule a scout visit | 30 minutes |
| Animatic creation | Editing software + time | Generate clips and assemble |
The Bottom Line
The process of previsualization in film has always been how serious productions manage the gap between a script and a shoot. What has changed is who can afford to do it properly. AI tools — specifically Film Studio's Storyboard mode, Camera controls, and clip generation — have made the full previsualization process available to productions at every scale.
The directors making the best use of their shoot time in 2026 are the ones who have already made the visual decisions before the crew assembles. Pre-viz is how they get there.
Frequently Asked Questions
Can I use ImagineArt Film Studio for pre-production?
Yes, that's the core use case this article walks through. Film Studio's Storyboard mode, Camera controls, and Genre/Movement settings let you test scene composition, lens choices, and pacing before a physical shoot, turning pre-production from a paper exercise into something you can actually see in motion.
How do I use Film Studio to pre-visualize a scene?
Start in Storyboard mode with your planned camera settings dialed in, generate a sequence of frames, and check whether the composition, framing, and lighting work the way you pictured them. From there, take a storyboard frame as a start frame in Create Video to test genre and movement combinations, and use the Camera section to verify lens and aperture decisions before committing to equipment or a shoot day.
Can AI replace traditional pre-production?
No, and the article is upfront about that rather than overselling it: this doesn't replace the physical decisions made on the day, it removes the expensive uncertainty around decisions that can be made in advance. A director or DP still makes the final calls on set; Film Studio just means fewer of those calls are being made blind.
How does Film Studio's Camera section help with pre-production?
It accepts real cinematographic inputs, camera type, lens type, focal length, and aperture, so you can test how a specific lens choice actually affects framing and depth of field before you rent the equipment. A 24mm versus an 85mm changes how a character sits in their environment; testing that in Film Studio first means the decision is already made by the time you're on location.
How much faster is AI pre-production than traditional storyboarding?
Based on the comparisons in this article: storyboarding a scene takes about 20 minutes versus 2-3 days with a traditional storyboard artist, testing two genre/movement options takes about 15 minutes versus a full test shoot day, and verifying a lens decision takes about 10 minutes versus committing to a rental. The gap is largest wherever a traditional workflow would otherwise require a dedicated shoot day or specialist just to test an idea. For a fuller breakdown, see the AI Film Studio vs. traditional production guide.
What types of scenes benefit most from AI pre-visualization?
Scenes where a decision is genuinely uncertain rather than obvious: a genre or tone that could plausibly go two directions, a composition that depends on a specific lens or aperture, or a scene tied to a location or lighting condition that's hard to schedule (golden hour, a specific weather condition, an unusual interior). Straightforward coverage shots with no real ambiguity benefit less, since there's nothing to test.
Is AI pre-production useful for experienced filmmakers?
Yes, though for a different reason than it helps beginners. Experienced filmmakers usually aren't guessing at basic composition, they're weighing genuinely close calls: a genre choice that could land two ways, whether a specific lens matches an emotional beat, whether a location will read the way it does in their head. Film Studio lets those specific, high-stakes judgment calls get tested in hours instead of being locked in on the shoot day itself. For more on the underlying logic, see how AI cinema works.
Syed Anas Hussain
Syed Anas Hussain is a computer scientist blending technical knowledge with marketing expertise and a growing passion for AI innovation. Curious by nature, he dives into new AI sciences and emerging trends to produce thoughtful, research-led content. At ImagineArt, he helps audiences make sense of AI and unlock its value through clear, practical storytelling.