
Tooba Siddiqui
Thu Mar 19 2026 • Updated Thu Mar 19 2026
11 mins Read
The green screen is stretched, the subject is accurately framed, and the shot is ready. You pressed the record button, nailed the shot, and opened your video editor for subtle refinements. But you end up finding jagged edges, green haze bleeding into your subject’s hair, and a background that looks awkwardly placed.
While green screen video editing is known to produce studio-level results, the process of accomplishing that often involves endless frustrations. Solo creators and smaller marketing teams without dedicated video editors have to go over budget to get it done right or rely on low-quality tools.
What Is Green Screen Video Editing?

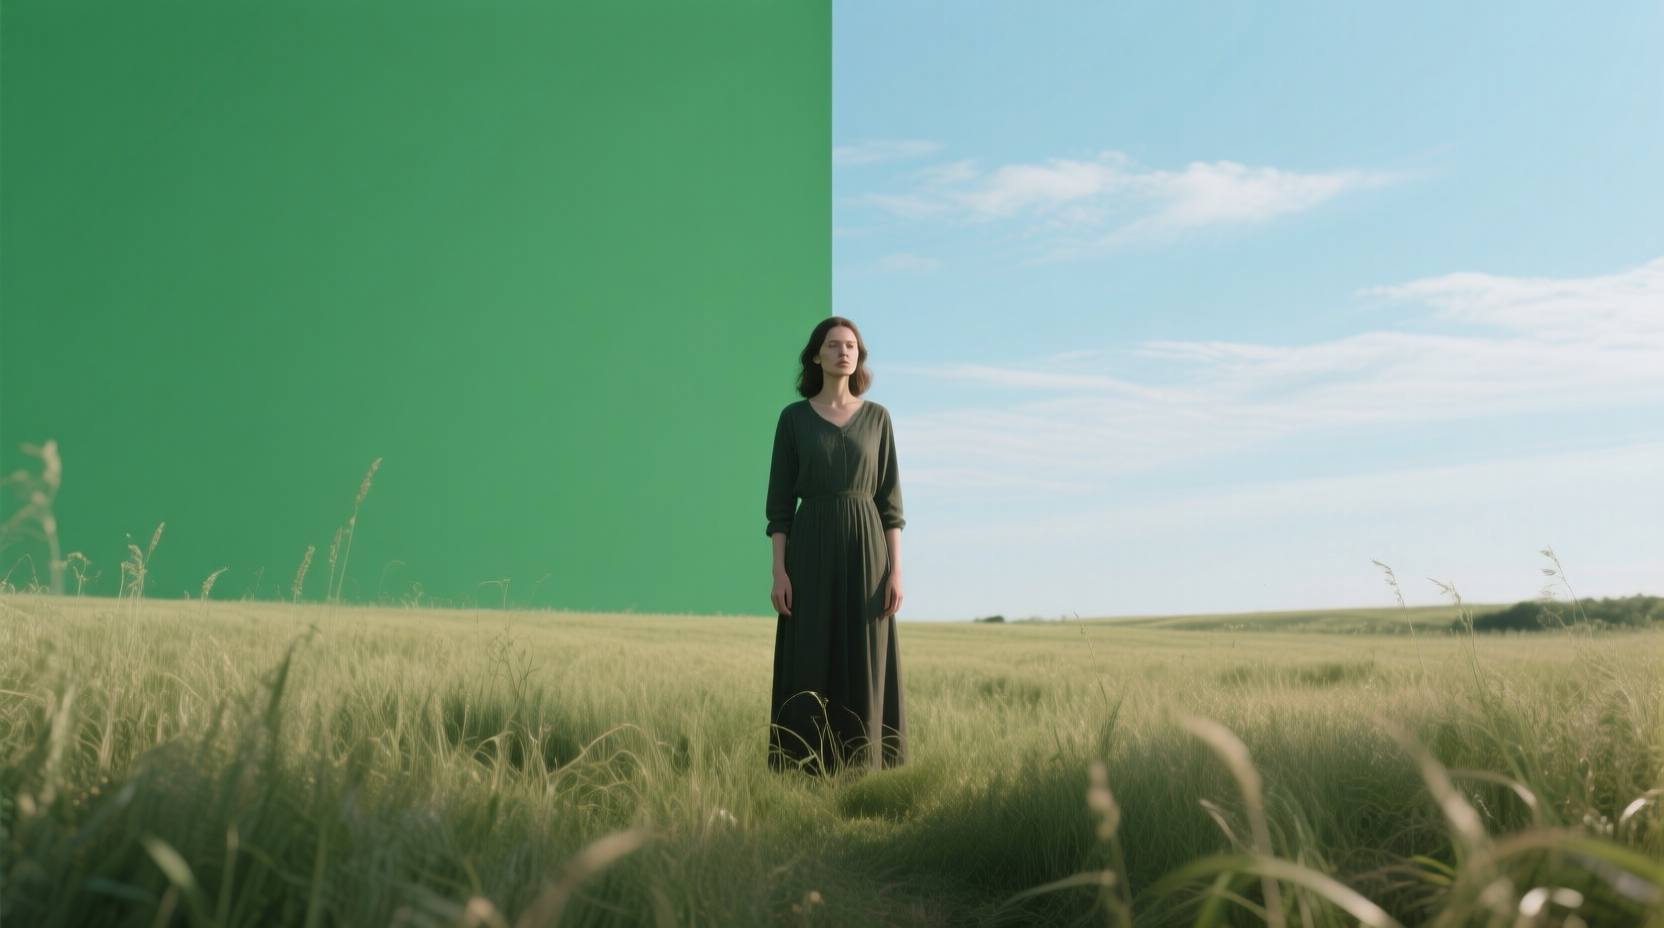
Green screen video editing is also known as chroma key compositing. It is a technique of filming a subject in front of a solid-colored backdrop, usually green or blue. Once the shot is captured, the backdrop is then digitally replaced with a different image or video in post-production. The edited video shows your subject to be in a setting or environment that was never physically there. It gives the filmmakers and creators complete creative freedom to create landscapes, scenes, or entirely different universes, like in the movie Life of Pi.
Filmmakers usually use green screen more than the blue screen. The green color offers the strongest contrast with the human skin tone, making it the default choice.
The Core Components of Green Screen Video Editing
A standard green screen video editing workflow has three parts:
- Video Background Removal (Keying)
To remove the green screen from the video, the editors have to isolate the subject and green backdrop from each video frame. The result is a transparent background with the subject in front of it. Issues like color spill, jagged edges, and missing pixels usually occur during the video background removal process.
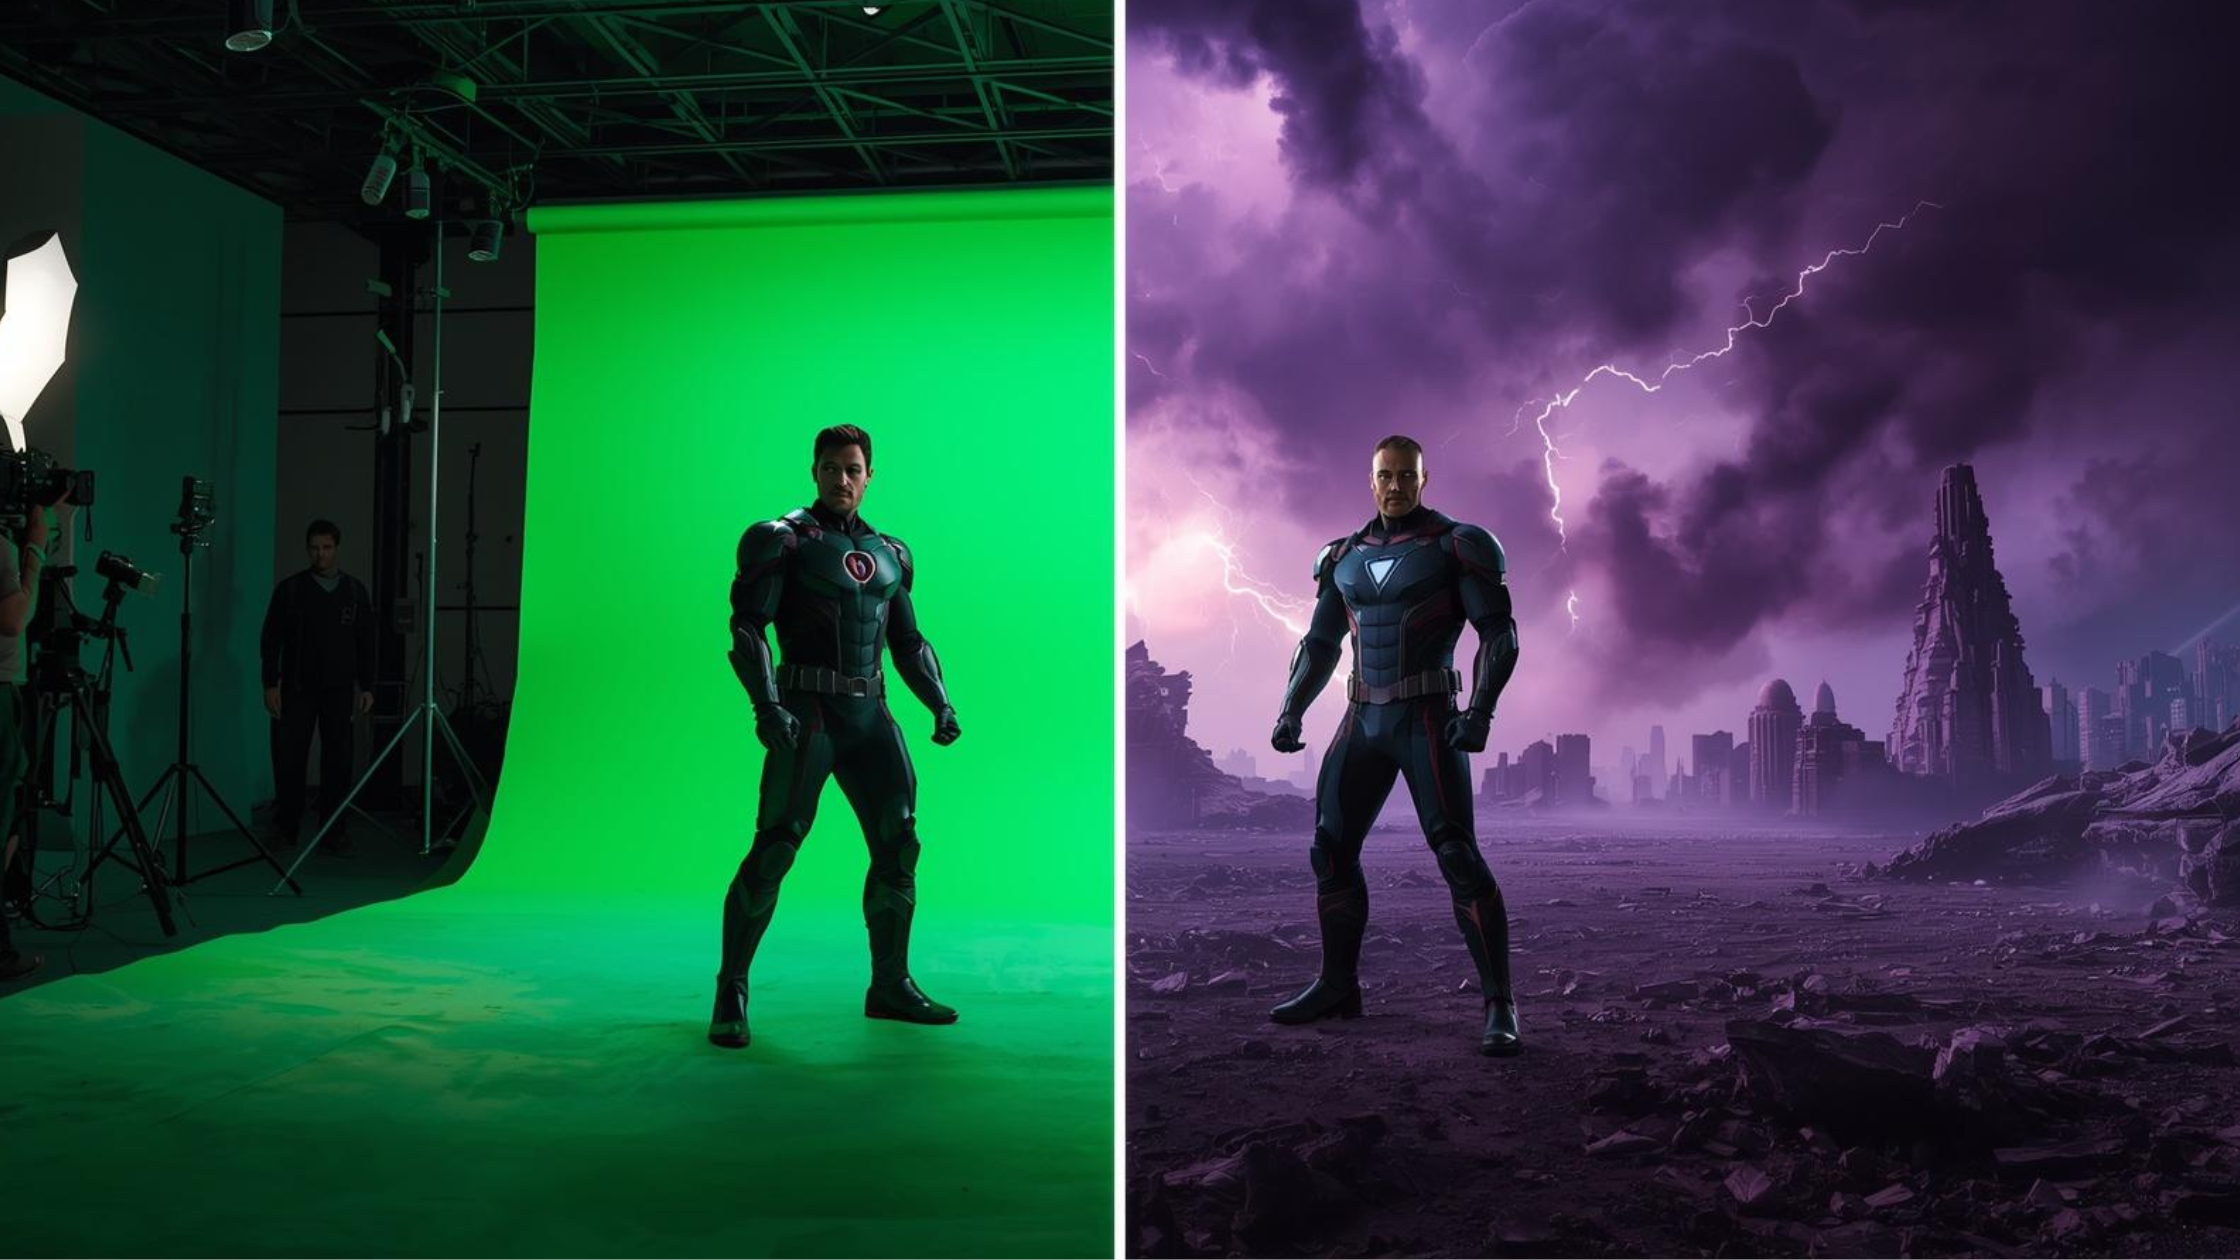
- Replace Video Background
It involves adding a new background behind the isolated subject. The new background can be an image, clip, animation, 3D environment, or an AI-generated video scene.
- Compositing and Color Matching
It involves blending the subject and the replaced video background. The video editors have to match lighting, balance color temperatures, and adjust depth-of-field between the two layers for a realistic look.
What AI Actually Does Differently in Green Screen Video Editing
Before moving to the how-to, it is important to understand what makes AI green screen removers different from traditional green screen video editing methods.
Traditional Chroma Key: Color-Dependent, Fragile
The chroma key technique involves the detection and removal of a certain color from video content, usually the color green. The traditional video background editor identifies and selects each pixel that matches the value of the color green and makes it transparent. This leaves a transparent backdrop behind the subject. However, this practice of removing green screen from video is entirely color-dependent.
Any subtle changes in the green screen, such as shadows, uneven lighting, or different shades of green, can result in visual artefacts, halos, and gaps. The produced video then has to be manually corrected frame by frame. The worst part? If your subject’s clothes match the hue in your backdrop, then you might just end up cleaning up footage for hours or even days.
AI Video Background Remover: Context-Aware, Adaptive
In AI video background changers, the algorithms analyze the different frames of the footage. It then separates the subject from the video background based on context, movement patterns, and depth. This makes the AI video background remover independent of colors, lighting, shadows, or hues. The edited video has cleaner cuts, edges, and no color spills or bleeding.
AI video background remover tools can process hair, semi-transparent fabrics, and even reflective surfaces that cause issues during manual video background removal. More importantly, they do it automatically, without requiring you to adjust individual parameters for every difficult frame.
How to Edit Green Screen Video with AI: Step-by-Step Guide
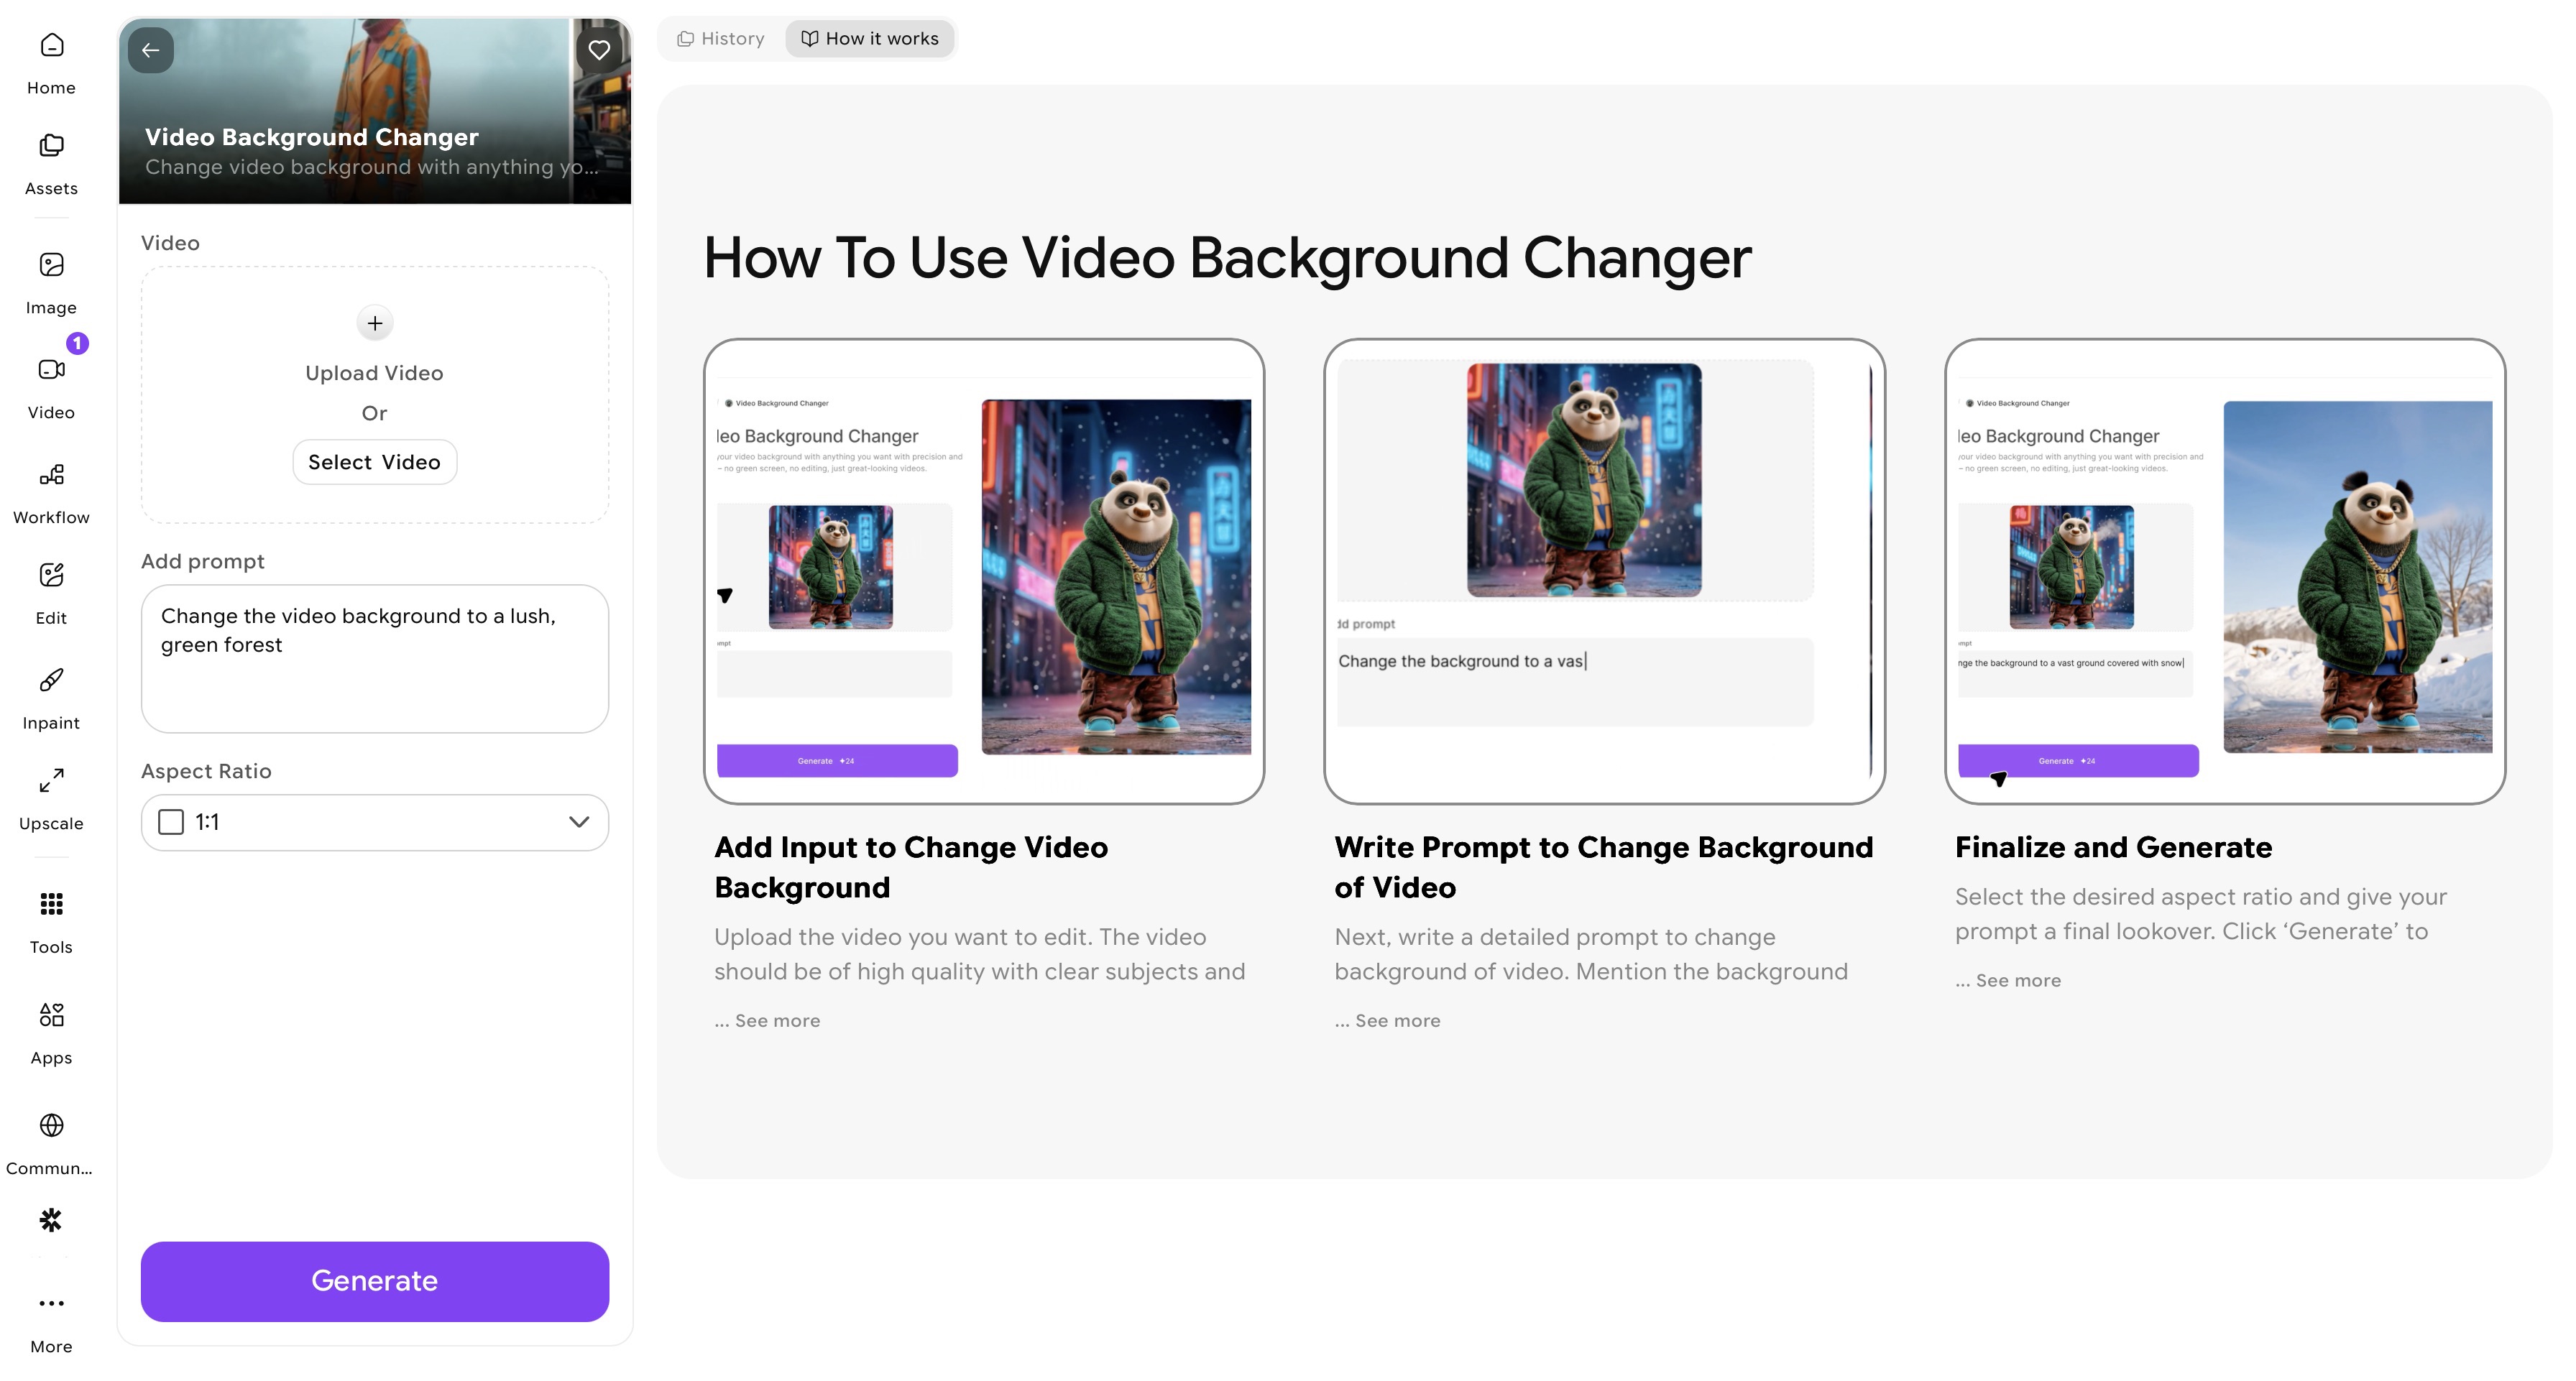 ImagineArt Video Background Changer app dashboard
On ImagineArt, you can remove green screen from video using two tools that work together to remove and change video background: the ImagineArt AI Video Background Changer to remove and replace video background using a text prompt, and the ImagineArt AI Video Editor to refine and enhance your video content.
Sign up on ImagineArt to receive 100 free daily credits that are refreshed every 24 hours. You can access AI Video Background Changer and AI Video Editor upon sign-up, without any software installation.
Step 1 — Upload Your Green Screen Video to ImagineArt
Once you have signed up, navigate to the sidebar and click on the ‘Apps’ icon. Click on the ‘video editing’ category and select the ImagineArt AI Video Background Changer app. Upload your green screen video.
ImagineArt supports all video formats, sizes, and orientations, including MP4, MOV, and more. For best results:
- Use high-quality videos with clearly visible and in-focus subjects.
- Avoid using highly compressed video files or footage with heavy filters and effects.
You can even generate your own video on ImagineArt AI Video Generator or use any video from the community collection or creation library. It helps you save time while experimenting.
Step 2 — Write a Prompt to Change Video Background
This is where ImagineArt AI Video Background Changer stands out from the traditional green screen remover tools on the market. Instead of relying on stock images, videos, or animation, you can describe your own background through a text-based prompt. It gives you more creative freedom to experiment with video backgrounds.
Be specific in your prompt. Mention background elements, preferred color palette, lighting conditions, visual effects, and environmental setting. The more descriptive the prompt, the more precise the video background removal and replacement.
Prompt Tip: Include lighting direction in your prompt to match how your subject was lit during filming. If your subject has warm side-lighting from the left, mention “warm ambient light from the left” in your background description. This helps ImagineArt AI Video Background Changer generate a background that looks naturally integrated rather than composited.
Step 3 — Select Aspect Ratio and Generate
Select the desired aspect ratio. ImagineArt AI Video Background Changer supports vertical (9:16), square (1:1), and widescreen (16:9) formats. Give your prompt a final look over and click the ‘generate’ button.
ImagineArt AI Video Background Changer will isolate your subject, remove green screen from video, and change video background without awkward placement, artefacts, or color spills. It ensures subject consistency and visual integrity throughout the video. You no longer have to set any parameters, refine edges, or fix color spills manually.
Step 4 — Preview and Make Final Adjustments
Preview your full video before downloading. Make sure to check for frame-to-frame consistency. ImagineArt AI Video Background Changer maintains consistency throughout, even with fast-moving subjects.
If anything looks off, tweak your prompt and regenerate, or use ImagineArt AI Video Editor to reprocess the relevant sections without re-editing or regenerating the entire video.
Step 5 — Refine and Export
Once you change video background, you can further refine your edited video in ImagineArt AI Video Editor for finishing touches. It is a drag-and-drop editor that lets you trim/clip videos, add elements, adjust text, synchronize music or voiceovers, or change aspect ratio and video orientation. Export the edited video in high resolution once you are satisfied with the edits.
Recommended read: How to Change Video Background | How to Add Background to Video
How AI Fixes the 3 Biggest Green Screen Video Editing Problems
Here’s how AI green screen remover tools handle the major problems with traditional green screen video editing:
Problem 1: Color Spill on Hair and Skin
When the green backdrop reflects onto the video subject, it leads to color spills on hair, clothing, and skin. This issue is quite recurring with blonde or light-colored hair and white or light-colored clothing. Fixing the color spills and blending them correctly requires hours of work, and the results can be underwhelming.
On the other hand, the AI handles this by analyzing which pixels belong to the subject layer and which belong to the video background. The AI video background editor then neutralizes the green color values and hues in the identified background areas. This way, the other colored parts of your video content remain untouched and unchanged. The result is natural-looking skin and hair without the telltale green haze that signals amateur green screen editing work.
Problem 2: Ragged or Unnatural Edges
Refined edges are one of the key distinguishers between traditional green screen video editing and AI video background removal. Traditional editing produces staircase artefacts and green halo effects, especially around hair strands, wisps, and semi-transparent fabrics. It happens because the traditional green screen remover software make binary pixel-by-pixel decisions based on color alone.
Comparatively, AI video background changers produce smooth, natural-looking edges because they understand the probabilistic relationship between pixels — a hair strand against a background isn’t completely subject or completely background, and AI handles that gradient correctly. This is particularly evident with fine hair, which is the traditional green screen editor’s nightmare and the AI tool’s standard capability.
Problem 3: Uneven Lighting and Shadows on the Screen
Shadows cast by your subject or lighting irregularities on the backdrop create dark patches that appear as a different shade of green from the rest of the screen. Traditional video background editor tools either miss these darker regions entirely (leaving background patches) or overcorrect and cut into your subject. Either way, manual cleanup is extensive.
While AI video background editors compensate for this during processing — rather than applying a uniform color threshold across the entire frame, the model adjusts its segmentation sensitivity locally based on what it detects in each region. This means darker sections of your backdrop are handled independently from lighter sections, and the AI’s output is consistent across the whole frame, even when your original lighting wasn’t.
Do You Even Need a Green Screen?
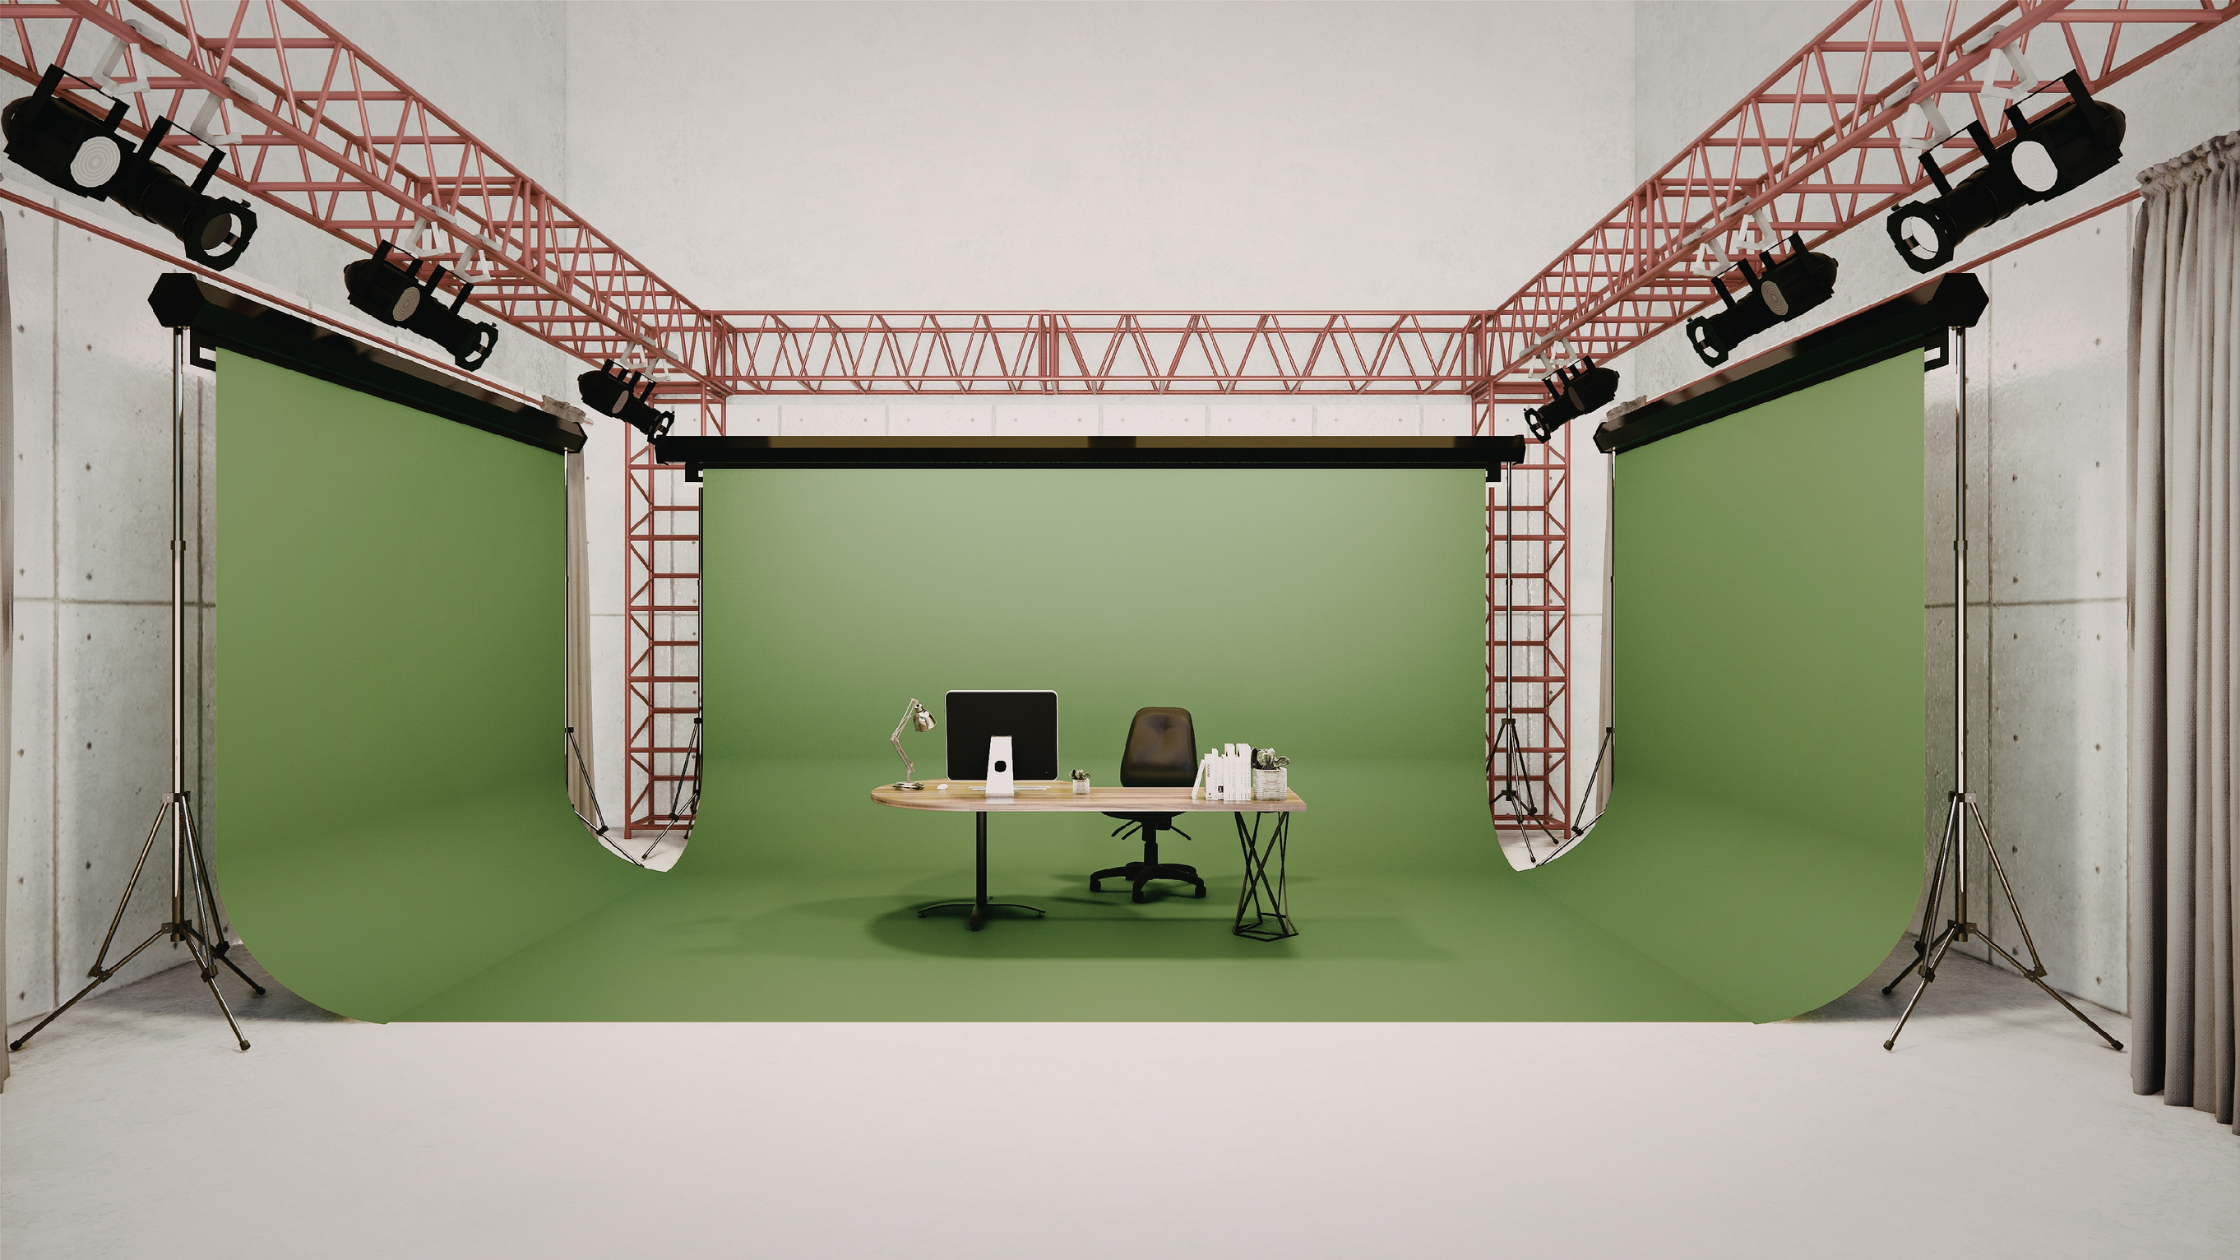
With AI video background remover, you can add any static or moving background, producing studio-level results ready to be published. It doesn’t mean green screen is no longer needed. Here’s a practical breakdown of when to use green screen:
- If you are a solo creator working from a home office or shooting in your bedroom, go for an AI video background changer. No green screen needed.
- If you are filming a subject's complex movements, use green screen and then utilize the AI video background editor for refinement.
- If it is a professional broadcast or film production, then a green screen is a must, along with an AI video background editor for post-processing.
- If you are filming on-the-go with a mobile, use AI video background changer only.
- If you are editing an explainer or product video, AI video background remover can simplify and speed up your workflow.
- If you want to reuse an old video with poor lighting, AI video background editor can help you fix the issues in just a few clicks.
The important nuance: AI and green screen aren’t mutually exclusive. If you have green screen footage that came out imperfect, AI is often the best tool for cleaning it up — not replacing it entirely.
Recommended read: 28 Video Background Ideas
4 Tips to Get Better Results from AI Green Screen Editing
These are the practical adjustments that separate clean, professional-looking AI composites from the ones that obviously look like AI-edited video:
Shoot in 4K, edit in your delivery resolution
More pixel data gives the AI’s edge detection algorithm more to work with. Shoot at the highest resolution your camera supports, then downscale to 1080p or 4K for your final export.
Use manual focus.
Autofocus drift creates inconsistencies between frames that disrupt the AI’s frame-by-frame subject tracking. Lock focus on your subject before you record and don’t touch it.
Match lighting between subject and background.
The most common reason a technically correct AI composite still looks fake is mismatched lighting. If your subject is lit with warm light from the left, your replacement background needs to show the same. This is a creative judgment call no AI tool makes for you — yet.
Always check hair and collar edges at 100% zoom.
AI handles these areas better than any manual method, but always verify at full resolution before exporting. Zoom into hair edges and collar areas specifically — these are where any remaining artifacts will appear.
Ready to Edit Green Screen Videos?
Green screen video editing has always had two phases: the frustrating manual work, and the moment it finally looks right. However, the AI tools like ImagineArt AI Video Background Changer have effectively eliminated the first phase of manual work, producing precisely edited videos. The workflow is now simpler, faster, smarter, and more forgiving than it’s ever been.
Frequently Asked Questions
No, you don’t need a physical green screen to use the AI video background remover and changer. Traditional green screen video editing required a green screen because the software worked by targeting and removing a specific color. AI tools work differently. You can upload footage shot in front of a bedroom wall, a cluttered office, or even an outdoor environment, and the AI video background changer will replace the background cleanly, without needing a green screen.
Yes. AI video background editors analyze each frame for visual context and separates subject from the background based on shape, depth, and movement. This means AI can often recover footage that would be completely unusable with manual keying, including shots with uneven lighting, compressed video, or shadows cast onto the backdrop.
Yes, you can remove green screen from video without any software download using ImagineArt AI Video Background Changer. It is entirely browser-based and requires only a stable internet connection.
Green spill is caused by light from the green backdrop reflecting onto your subject — most visibly on hair, white clothing, and skin near the shoulders. It happens when the subject is positioned too close to the backdrop.
Tooba Siddiqui
Tooba Siddiqui is a content marketer with a strong focus on AI trends and product innovation. She explores generative AI with a keen eye. At ImagineArt, she develops marketing content that translates cutting-edge innovation into engaging, search-driven narratives for the right audience.