
Aqsa Nazir Kayani
Wed Mar 25 2026 • Updated Wed Jun 03 2026
14 mins Read
Interior design used to be expensive, slow, and honestly kind of gatekept. You either hired a professional or spent weeks collecting Pinterest boards you never actually used.
Not anymore.
The best AI interior design tools in 2026 let you upload a photo, describe what you want, and get a photorealistic result in seconds. No design degree. No expensive software. No waiting.
This guide walks you through ImagineArt's full suite of AI tools for interior design, how each one works, what to click, what to type, and how to combine them into a workflow that gets real results. Each interior design AI tool in this guide solves a different problem in the design workflow — from first concept to final client presentation.
Why AI Interior Design Tools Matter Now
Unlike traditional interior design software that takes months to master, AI interior design software in 2026 works from a photo and a sentence. People used to ask, "Can AI really do interior design?" That question is dead. The new question is "how do I get the best results out of it?"
The answer is simple: know your tools, use them in the right order, and be specific with your inputs.
Here is what the best AI tools for interior design actually help you do:
- View a finished room before you spend a single dollar on renovations
- Generate multiple design directions in minutes instead of weeks
- Present professional-looking concepts without hiring a 3D rendering specialist
- Automate repetitive steps so you focus on the creative decisions
How to Use AI for Interior Design
Using AI for interior design follows a simple process: upload an image or sketch, describe the style and mood you want, and the AI generates a photorealistic result in seconds.
The typical workflow runs in three stages:
- Visualize — upload a room photo and generate redesigned versions in different styles to find your direction
- Develop — convert a sketch or floor plan into a detailed 3D render to refine the concept
- Present — generate a video walkthrough of the finished design for client or listing use
Each stage has a dedicated tool — and this guide covers all of them in detail below. If you want the full step-by-step walkthrough before diving in, our how to use AI for interior design guide covers the complete process from brief to final export.
8 Best AI Interior Design Tools 2026
Here's a breakdown of 8 best AI interior design tools:
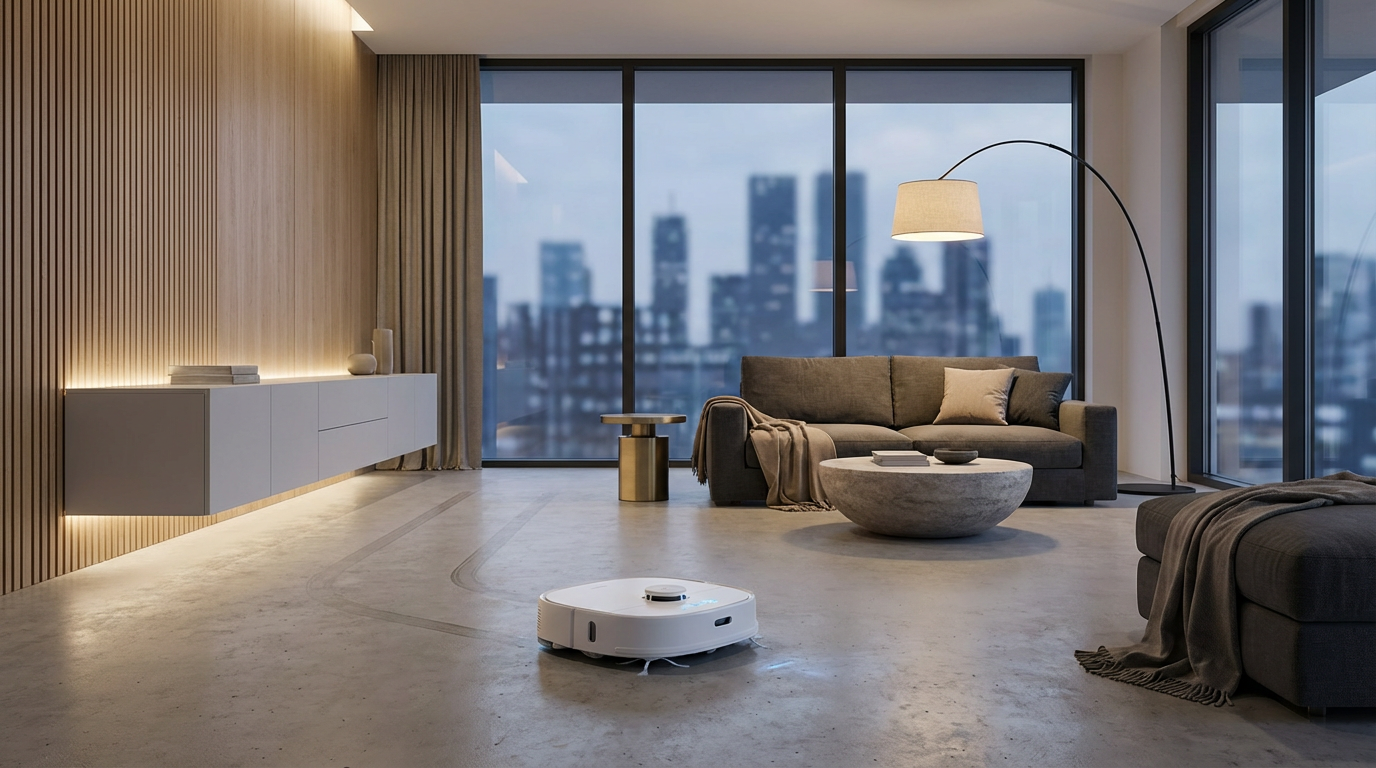
1. AI Interior Design: Redesign Any Room Instantly
ImagineArt AI Interior Design tool is where most projects start. You upload a photo of a real room, describe the style you want, and the AI generates a fully redesigned version of that space. As an AI home design tool for homeowners, it removes the guesswork from renovation decisions — see the finished result before spending a penny.
It does not just apply a filter. It reads the actual dimensions, layout, and depth of your room and redesigns it while keeping the real geometry intact. The furniture placement makes sense. The proportions stay accurate. The result looks like something you could actually build.
How to use it:
Step 1: Upload your room photo. Use a clear, wide-angle photo that shows the full room. Select the room type from the preset options after uploading.
Step 2: Write a detailed style prompt. This step makes or breaks your result. Here is the difference:
- Bad prompt: "Modern bedroom."
- Good prompt: "Japandi bedroom with a low oak bed frame, off-white linen duvet, warm indirect lighting behind the headboard, a woven jute rug, and minimal decor on the walls."
Cover these four things in every prompt: style name, materials, lighting mood, and specific items you want to see.
Not sure which style fits your space? Check out this guide on interior design styles to nail your direction before you start prompting.
Step 3: Generate multiple variations. Run at least five variations before committing to a direction. Change one variable at a time: style name, material, or lighting. Compare outputs and pick what works.
 Aesthetic Interior Design Created on ImagineArt
Who should use this tool:
Aesthetic Interior Design Created on ImagineArt
Who should use this tool:
- Homeowners who want to see renovation options before spending money
- Interior designers who need quick concept directions for client meetings
- Real estate agents who want virtual staging that looks credible
- Professional AI interior designers building initial concept decks for clients
- Content creators who need aesthetic room visuals for their audience
2. Sketch to Render: Turn Any Sketch Into a Render
Most people sleep on this one. It is one of the most powerful free AI interior design tools available and you do not need to be a good artist to use it.
You draw a rough sketch of a room layout, upload it, add a style prompt, and the AI turns it into a photorealistic render. Hand-drawn boxes on notebook paper count. The tool does not care about artistic quality.
What makes Sketch to Render special is that it reads your spatial intent first and then enhances it visually. Your layout decisions survive the rendering process.
How to use it:
Step 1: Draw and upload your sketch. Floor plan, bird's eye view, or side perspective all work. Draw on paper and photograph it, draw digitally, or export a CAD file. The tool accepts JPG, PNG, hand-drawn sketches, line drawings, and CAD exports. Keep lines clear so the AI can read your spatial intent.
Step 2: Write your render prompt. Your sketch handles the spatial structure. Your prompt handles the visual style. Include style name, materials, color palette, and lighting mood. Example: "Modern Scandinavian style with soft natural lighting, light birch wood furniture, white walls, and a neutral grey rug."
Step 3: Generate and iterate. Keep the same sketch and change only the style prompt. One floor plan becomes five completely different aesthetic directions in under ten minutes.
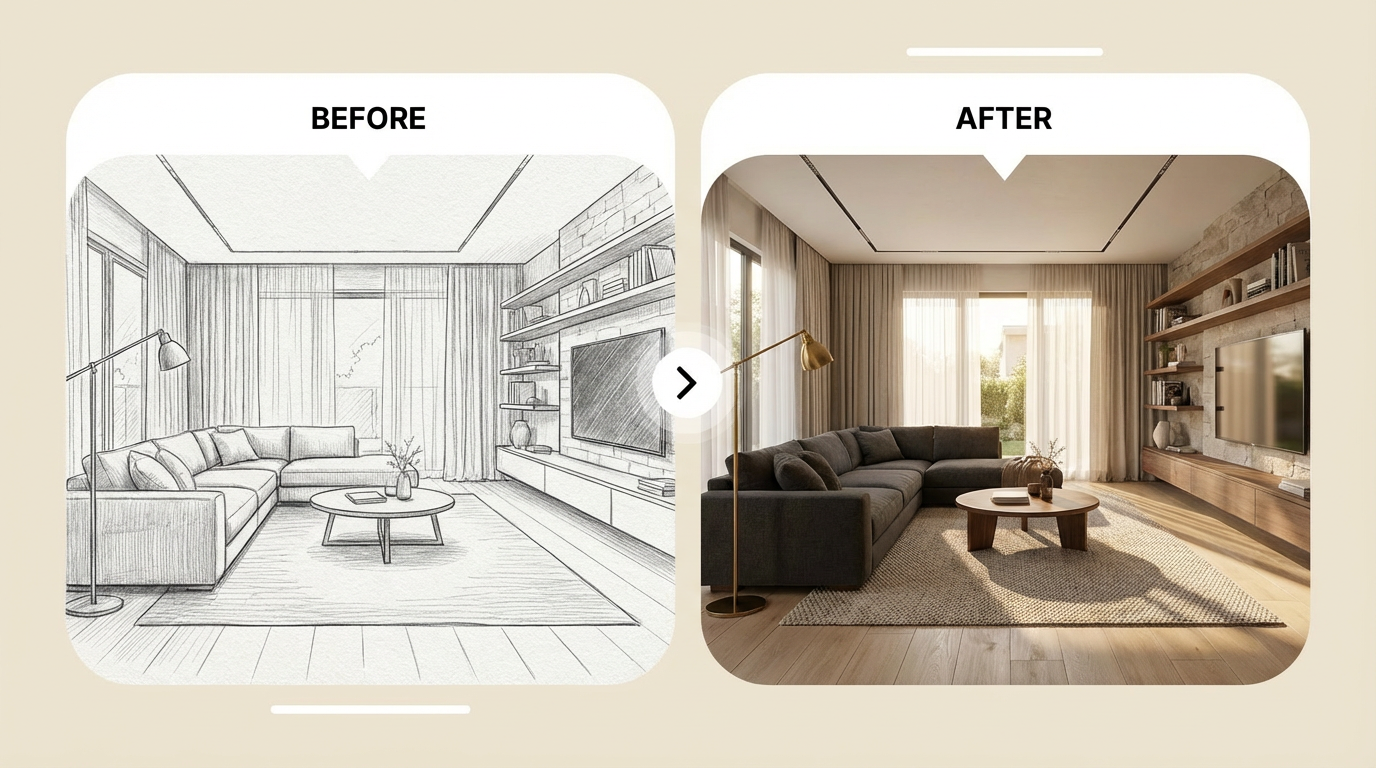 Aqsa_kiyani_i_want_you_to_create_the_similar_concept_sketch_to_render_with_t_6bcc4ad4-b0ec-4492-bddb-3aba60d9da5a.png
Best use cases:
Aqsa_kiyani_i_want_you_to_create_the_similar_concept_sketch_to_render_with_t_6bcc4ad4-b0ec-4492-bddb-3aba60d9da5a.png
Best use cases:
- Designers validating a spatial concept before investing time in detailed plans
- Homeowners communicating exactly what layout they want without design vocabulary
- Architecture students testing layouts and presentation renders quickly
- Anyone who has an idea in their head and needs to see it before explaining it
3. ImagineArt Flow: Automate Your Entire Design Process
This is the tool that separates people who use AI occasionally from people who actually build systems with it.
Flow is ImagineArt's node-based workflow builder. Instead of using each tool one at a time and manually moving files between steps, you connect them all into one automated pipeline. Build it once, run it on every project.
What node-based actually means:
A node is one operation: generate an image, apply a style, relight, change angle, upscale. You connect nodes by linking them together. The output of one node automatically becomes the input of the next.
How to build your first workflow:
Write down every step your design process follows from first draft to final deliverable. A typical process looks like this: upload room photo, generate style concepts, render sketch layout, adjust lighting, generate multiple camera angles, export for client.
In Flow, each step becomes a node. Connect them in order, save as a template, and every future project that follows the same process skips setup entirely.
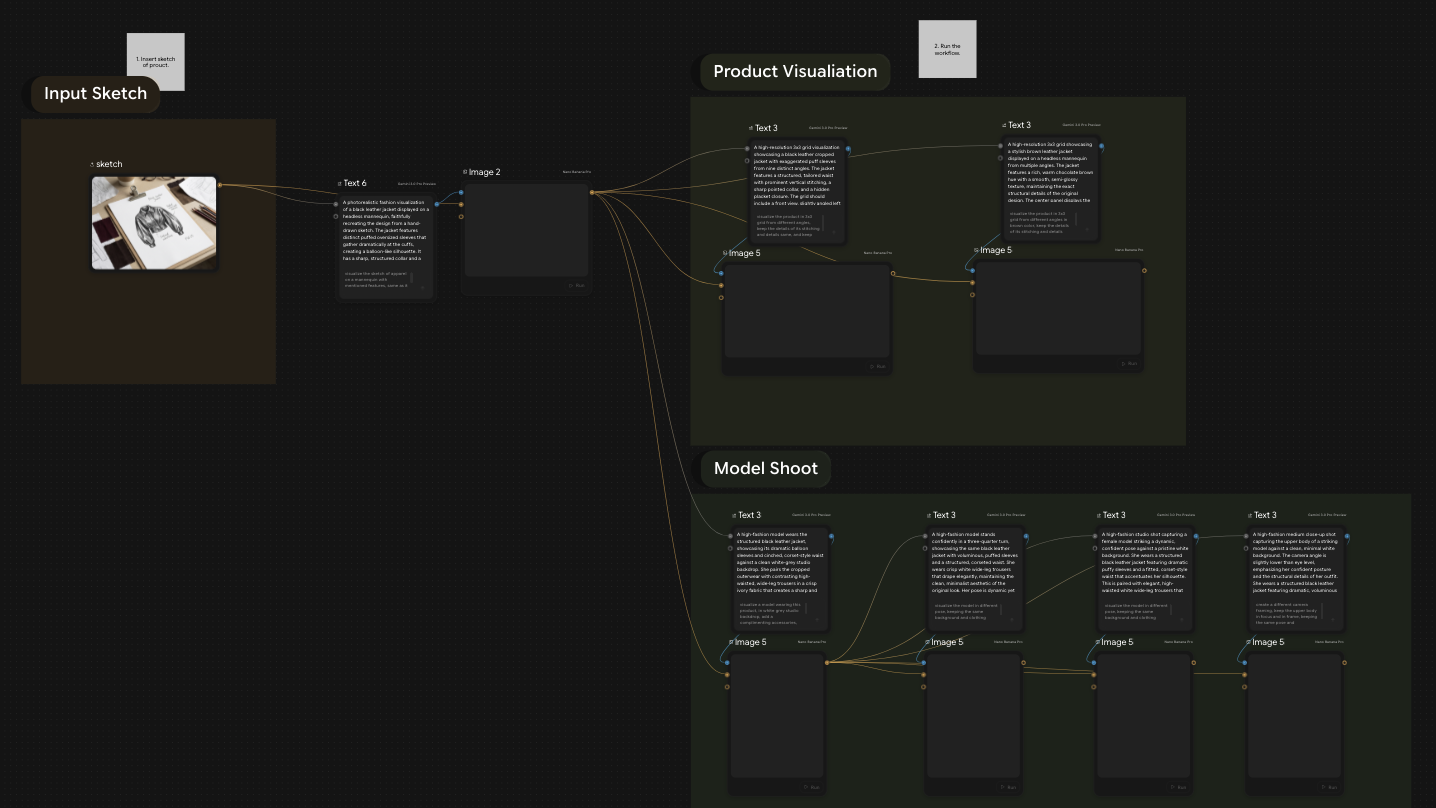 ImagineArt Workflow - Try on ImagineArt
Why this is worth doing:
ImagineArt Workflow - Try on ImagineArt
Why this is worth doing:
- Every output goes through the same quality process automatically
- Multi-step work that took an hour takes minutes
- You handle more projects without working more hours
For anyone running an interior design business, Flow also serves as a powerful AI marketing tool. Build one workflow that takes a finished design, generates multiple lighting versions, and produces different camera angle shots. A full batch of social content in one automated run.
4. AI Relight: Control Lighting on Any Interior Image
Lighting is what separates a flat render from a stunning one. ImagineArt AI Relight tool gives you complete manual control over lighting direction, intensity, and color on any image without reshooting or re-rendering from scratch.
You get two modes: presets for quick results and 3D manual controls for precise adjustments. The manual controls let you position the light from six directions, set intensity from 0 to 10, and pick any color. Shadows, highlights, and reflections update in real time.
How to use it:
Step 1: Upload your interior image. Works on ImagineArt renders, real room photos, or any image you have.
Step 2: Pick your mode and adjust. Use presets for speed or manual controls to match lighting precisely to the mood the space needs. Here is a quick reference for what works:
- Bedroom or living room: Warm light, soft side direction, intensity around 6.
- Kitchen or home office: Cool, even light from the front, intensity around 7.
- Luxury or editorial look: One strong side light, higher intensity, dramatic shadows.
- Natural light feel: Warm white, slight top-right or top-left direction, intensity around 5.
Step 3: Generate and download. The tool delivers a professionally lit image ready to use in seconds.
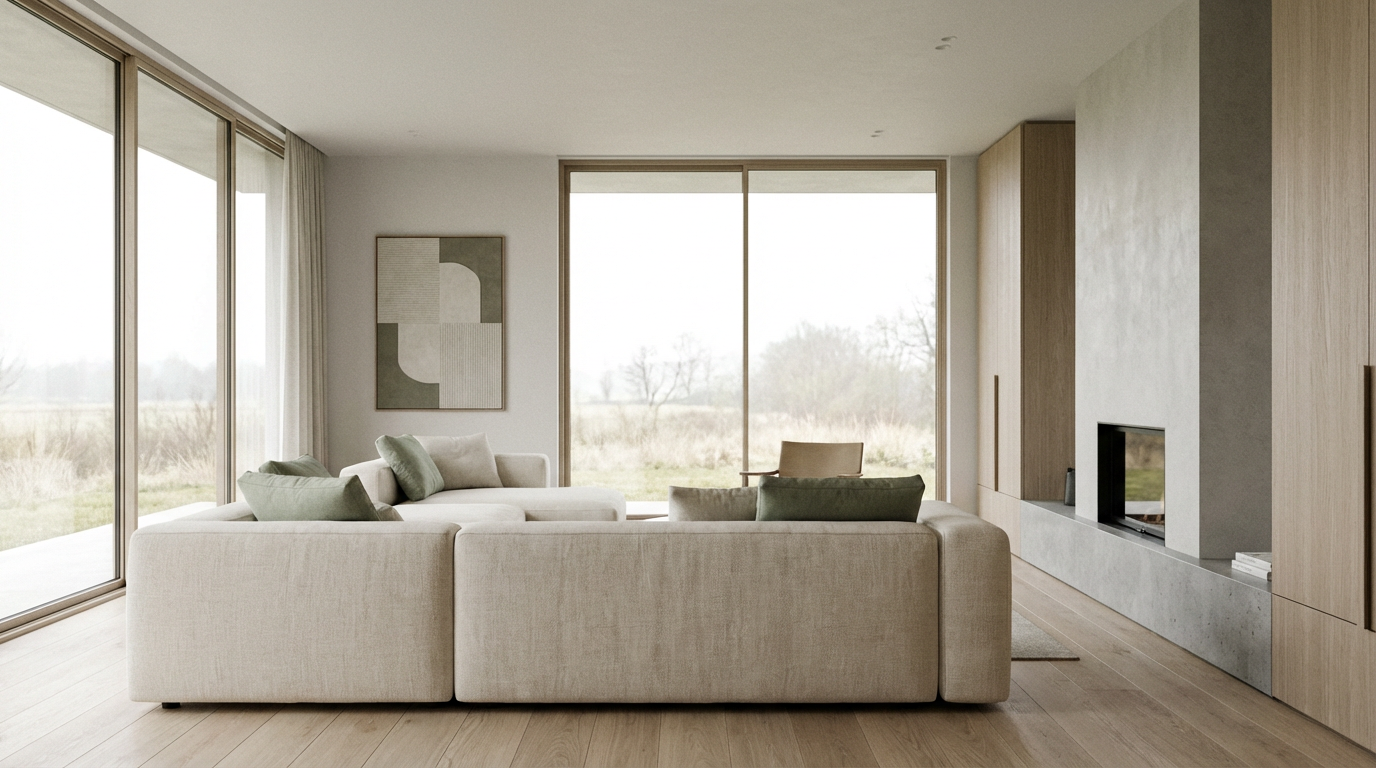
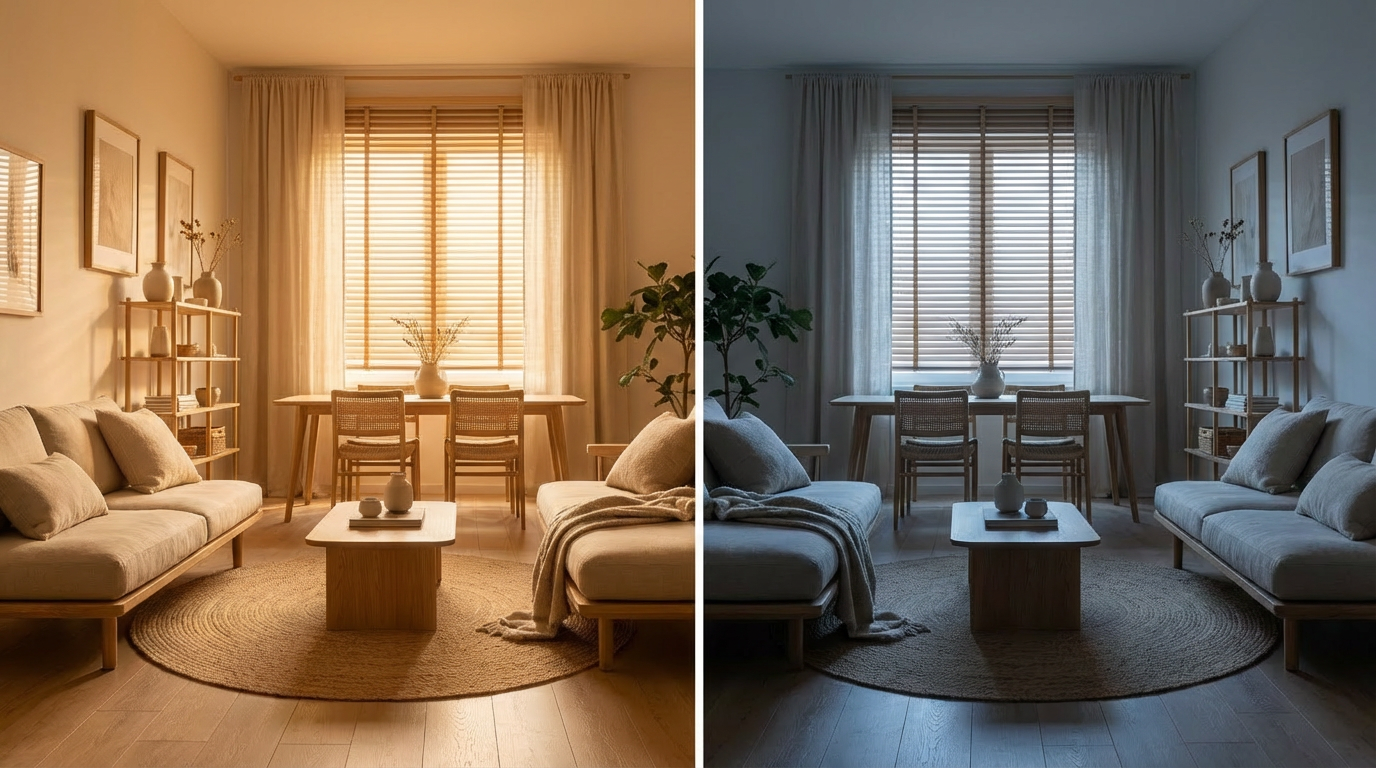 Aqsa_kiyani_keep_the_concept_but_change_the_interior_design_to_japandi_c42bea8c-0038-4f8e-8e30-be32b4d6cb9e.png
Run the same render through Relight three times with different setups. Show morning, afternoon, and evening lighting in one client presentation. That conversation used to require a lighting specialist. Now it takes fifteen minutes.
Aqsa_kiyani_keep_the_concept_but_change_the_interior_design_to_japandi_c42bea8c-0038-4f8e-8e30-be32b4d6cb9e.png
Run the same render through Relight three times with different setups. Show morning, afternoon, and evening lighting in one client presentation. That conversation used to require a lighting specialist. Now it takes fifteen minutes.
5. Camera Angles: Get Multiple Perspectives From One Image
One photo shows one perspective. A room has corners, depth, architectural features, and spatial flow that a single angle cannot communicate.
The Camera Angles tool solves that. You take any interior image and shift the viewpoint. The AI reconstructs the scene from the new perspective without any reshooting.
You get three slider controls: Rotation (Left/Right), Move (Up/Down), and Zoom.
How to use it:
Step 1: Upload your interior image. Start with a clean, well-composed render or photo.
Step 2: Adjust the sliders.
- Rotation: A 15 to 25 degree shift reveals the most useful information without distorting proportions.
- Move Up/Down: Moving up shows floor area and layout. Moving down makes ceilings feel taller and furniture more prominent.
- Zoom: Pull back to make a room feel spacious. Zoom in to highlight a specific design feature.
Step 3: Generate your new image. The tool delivers a clean, polished result ready for presentations or social media.
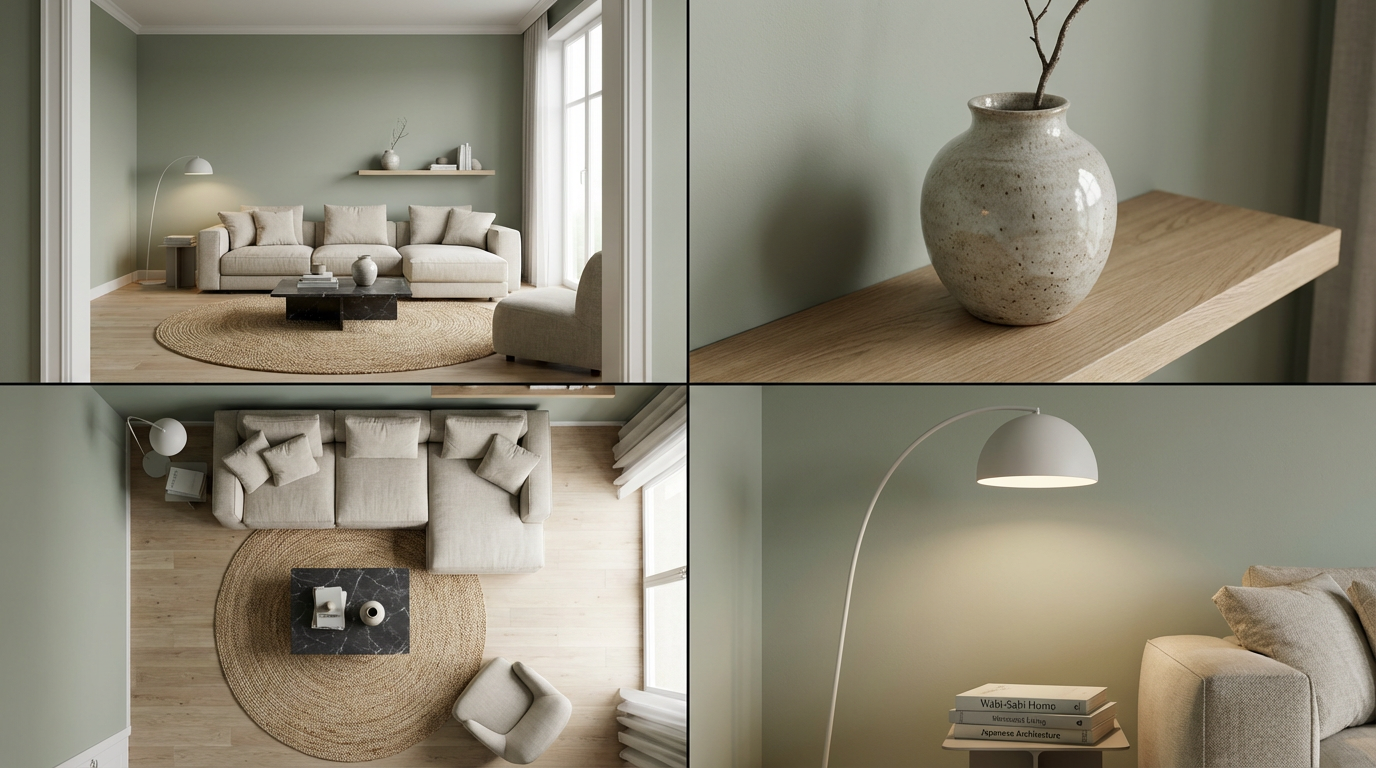 Aqsa_kiyani_create_an_aestehtic_room_being_shown_from_different_angls_9002992a-a2b4-4885-9044-8fe87c167b00.png
Take one strong final render and run it through Camera Angles four times: wide-angle for spatial overview, slight rotation for room depth, elevated position for layout clarity, and a zoomed detail shot. Four images that together tell the complete story of the space. A full client presentation package from one base image in about ten minutes.
Aqsa_kiyani_create_an_aestehtic_room_being_shown_from_different_angls_9002992a-a2b4-4885-9044-8fe87c167b00.png
Take one strong final render and run it through Camera Angles four times: wide-angle for spatial overview, slight rotation for room depth, elevated position for layout clarity, and a zoomed detail shot. Four images that together tell the complete story of the space. A full client presentation package from one base image in about ten minutes.
6. Interior Design Video Generator: Create Room Walkthroughs in Seconds
Most AI interior design tools stop at still images. ImagineArt Interior Design Video Generator takes any room image — a redesigned render, a sketch output, or a real photograph — and converts it into a cinematic walkthrough video using professional camera angle presets.
For interior designers, this is the presentation layer that no static render provides: instead of asking a client to imagine moving through a space, you show them doing it. For real estate professionals, properties marketed with video walkthroughs sell significantly faster than those with static photography alone.
How to use it:
Step 1: Upload your room image Use any render from the tools above or an existing photograph
Step 2: Select a camera movement preset Slow push-in, wide pan, corner sweep, or overhead reveal
Step 3: Generate and download The AI produces a professional-quality walkthrough video in seconds, ready for client presentations or property listings
Best use cases:
- Interior designers presenting final concepts to clients
- Real estate agents creating listing videos for vacant or staged properties
- Property developers producing marketing materials before construction completes
- Content creators building interior design portfolio videos
7. RoomGPT: Fast Room Redesign for Homeowners
RoomGPT is a lightweight, free AI interior design tool focused on homeowners who want quick visual inspiration from a room photo. Upload an image, select a style, and get a redesigned version in seconds — no prompt writing, no parameter adjustment.
Strengths:
- Simple enough for first-time users.
- Works on any device.
- Free tier available with daily generation limits.
Limitations:
- No sketch-to-render capability.
- No lighting control or camera angle tools.
- No workflow automation.
- Style range is narrower than ImagineArt's full model suite.
Best for:
- Homeowners exploring style options quickly before consulting a designer.
- Not suited to professional or commercial design workflows.
Pricing: Free tier with daily limits. Paid plans from approximately $9.99/month.
8. Spacely AI: Professional Interior Design Visualization
Spacely AI is a professional-grade AI interior design platform built for design studios and enterprise teams. It handles room redesign from photos with high style fidelity, supports brand kit integration for commercial projects, and offers client portal features for structured feedback and approval workflows.
Strengths:
- Strong output quality for commercial and hospitality projects.
- Brand kit consistency across a design project.
- Client collaboration tools built into the platform.
Limitations: Pricing is significantly higher than ImagineArt. No sketch-to-render or video generation. Free tier is limited to very low generation volume.
Best for:
- Interior design studios managing multiple client projects simultaneously where brand consistency and client portal access matter more than cost.
Pricing: Paid plans start at approximately $39/month. Limited free trial available.
How to Combine ImagineArt AI Interior Design Apps
Each ImagineArt app does its job well on its own. Together, they cover the entire design process from first idea to final deliverable.
Here is the full workflow in order:
Phase 1: Concept. Open the AI Interior Design tool. Upload a room photo or start from a preset. Write a detailed style prompt. Generate five variations. Pick the direction that fits the brief best.
Phase 2: Layout. Sketch your furniture arrangement and spatial plan. Upload it to Sketch to Render with your chosen style prompt from Phase 1. Generate multiple renders to validate the layout before going deeper.
Phase 3: Refine. Take your strongest sketch render back into the AI Interior Design tool. Push the prompt further with specific materials, exact furniture descriptions, and detailed color notes. Run another round to get a more polished output.
Phase 4: Lighting. Take your best render into AI Relight. Generate three versions covering warm residential, cool functional, and dramatic editorial lighting. Pick the one that best sells the concept.
Phase 5: Perspectives. Run your final lit render through Camera Angles. Generate a wide shot, a rotated depth shot, an elevated layout shot, and a zoomed detail shot.
Phase 6: Automate. Open Flow and build this whole sequence as a node-based workflow. Save it as a template. Your next project skips the setup and goes straight to execution.
This is the difference between occasionally using free AI interior design tools and actually building a serious design practice on top of them.
AI Interior Design Tools for Businesses
If you run an interior design firm, a furniture brand, a real estate agency, or any business where visuals matter, the value here goes further than personal projects.
Here is what changes when you build your workflow properly:
- You pitch more clients because concepts take minutes to generate instead of days
- You cut revision rounds because clients see their direction early and clearly
- You produce consistent marketing visuals without booking a photographer every time
- You scale your output without scaling your team or your hours
Staying on top of what clients actually want right now also matters. If you want to know what styles and aesthetics are driving demand in 2026, this rundown of the latest interior design trends is a solid reference to keep your concepts feeling current.
The best AI tools for interior design 2026 give smaller operations the production capacity that used to require a full team. You can explore the full business use case at ImagineArt for Interior Design Businesses.
Final Thoughts on AI Interior Design Tools
The top AI interior design tools in 2026 do not replace good design instincts. They amplify them. Better inputs produce better outputs every single time. The designer who understands these tools deeply gets results that look nothing like what a casual user gets from the same platform.
ImagineArt's suite covers every stage of the process: concept, layout, lighting, perspective, and automation. You start free. You build a process that fits how you work. You get faster and better with every project.
Start with the AI Interior Design tool. Try Sketch to Render on your next layout idea. Run your best output through AI Relight and Camera Angles. Build your first automated pipeline in Flow once you understand how your process runs.
The tools are free. The only thing left is to start.
Frequently Asked Questions
What are the best AI interior design tools in 2026?
ImagineArt offers the best AI interior design tools. They allow you to redesign rooms, turn sketches into renders, fix lighting, and adjust camera angles in one platform.
Can I use these tools without design experience?
Yes, these tools are designed for everyone. You only need a photo of your room and a clear description of your goal. ImagineArt AI Interior Design handles the rest and produces professional looking results.
How do AI interior design tools work?
You upload a photo or sketch, describe the style you want, and ImagineArt AI interior design generates a redesigned version of your space. It preserves the real layout and proportions so the result looks accurate and realistic.
Can AI interior design tools help me plan a renovation?
Yes, this is one of their strongest use cases. You can explore multiple design directions from a single photo before spending on furniture or construction. This removes guesswork from the renovation process.
What is the sketch to render tool about on ImagineArt?
This feature converts a rough room sketch into a realistic interior image. You upload your sketch, define the style, and the AI generates a finished render that follows your original layout.
Are these AI interior design tools free?
ImagineArt is an interior design tool free to start — 100 credits on signup, covering room redesign, sketch renders, lighting, and camera angles.
What is the best AI for interior design?
The best AI for interior design depends on the task. For room photo redesign and sketch renders, ImagineArt leads. For fixing lighting and camera angles, ImagineArt offers dedicated apps. ImagineArt is the only option covering all stages in one free platform."
Aqsa Nazir Kayani
Aqsa Nazir Kayani specializes in SaaS and Gen AI, delivering search-optimized content that boosts visibility and strengthens brand authority.