
Aqsa Nazir Kayani
Thu Mar 26 2026 • Updated Tue Apr 14 2026
13 mins Read
You took the shot. The angle was your best. The outfit was giving. The location was a chef's kiss and ‘gram-worth. You get home, open the photo, and …. it looks like it was taken inside a sad office building at 3pm on a Tuesday. YIKES!
Don’t cry, it happens to literally everyone. And nine times out of ten, the culprit is lighting.
Photography lighting basics are the thing nobody talks about enough when you're starting out. Everyone's busy recommending cameras and lens kits when the actual skill, the one that separates "oh wow" from "oh... okay" is just understanding how light works.
It costs nothing to learn, but it changes everything about your photos.
This guide is the deep dive you actually needed. Natural light, studio setups, portraits, products, the works.
And yes, we're weaving in some AI tools along the way because it's 2026 and working smarter is always the move.
Lighting is the most important skill in photography, period.
Read again: not a skill. THE skill. Before you touch a camera setting, before you think about the vibe, before you even pick your subject, you need to understand light. Light creates dimension, mood, texture, and depth in a photo.
Without good lighting, even the most expensive gear will produce mediocre results.
Here's the mindset shift that changes everything: light is a tool, not a given. The basics of photography and lighting come down to learning how to see it, shape it, and use it with intention. That's what separates a snapshot from a photograph. Once you get that, everything else starts clicking.
The Core Concepts: Basics of Lighting in Photography
If you ask anyone, "What makes a good photograph?", 9 out of 10 times, it'll be the lighting. Here are the fundamental concepts you need locked in before anything else.
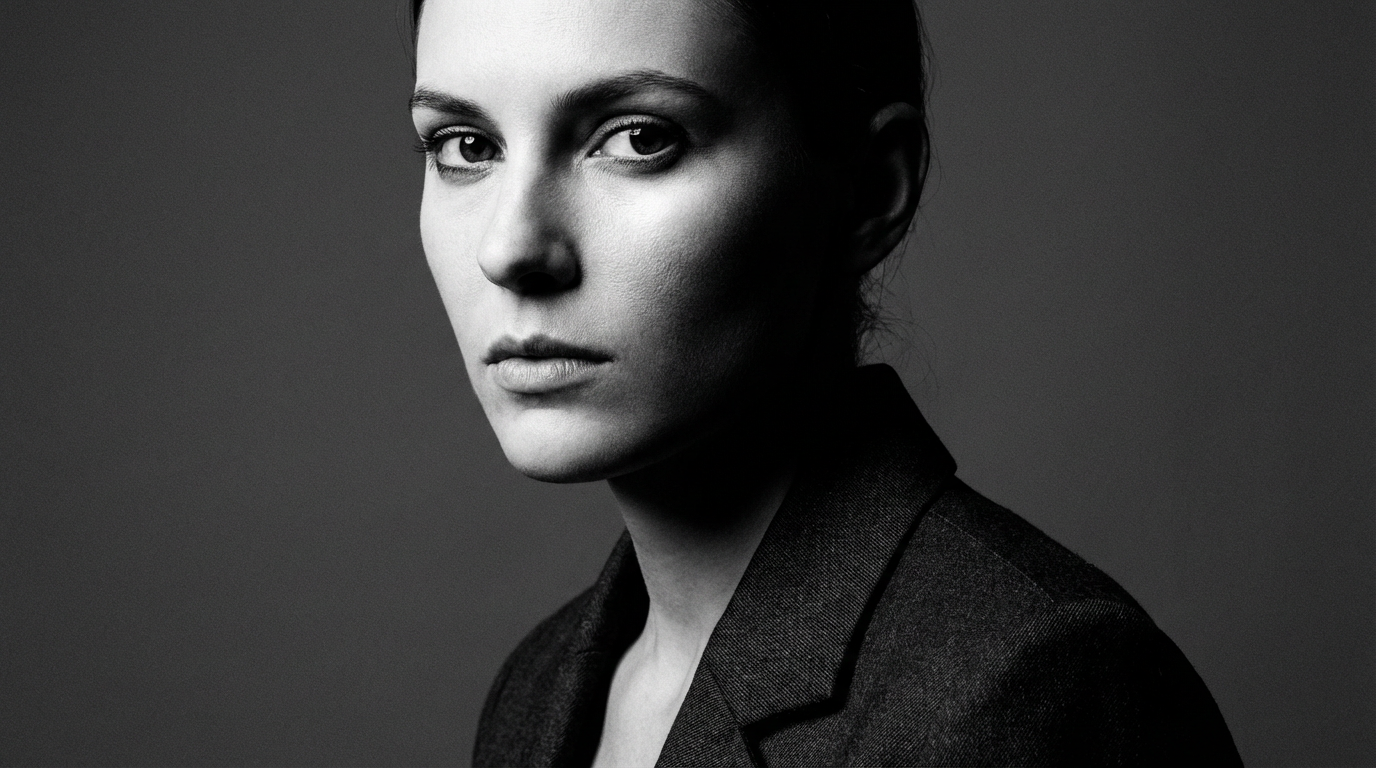
1. Hard Light vs. Soft Light
This is the first thing every beginner needs to understand about photography and lighting basics, and honestly, it's also one of the most misunderstood.
Hard light comes from a small, direct source like the midday sun or a bare flash. It creates sharp, defined shadows with high contrast. Think dramatic portraits, bold product shots, strong silhouettes. It's not "bad light." It's intentional light used with a purpose.
Soft light comes from a large or diffused source like an overcast sky, a softbox, or light bouncing off a wall. It wraps around your subject, creating gentle shadows and even tones. Soft light is universally flattering and forgiving, which is why it's the go-to for beauty photography, newborns, and food.
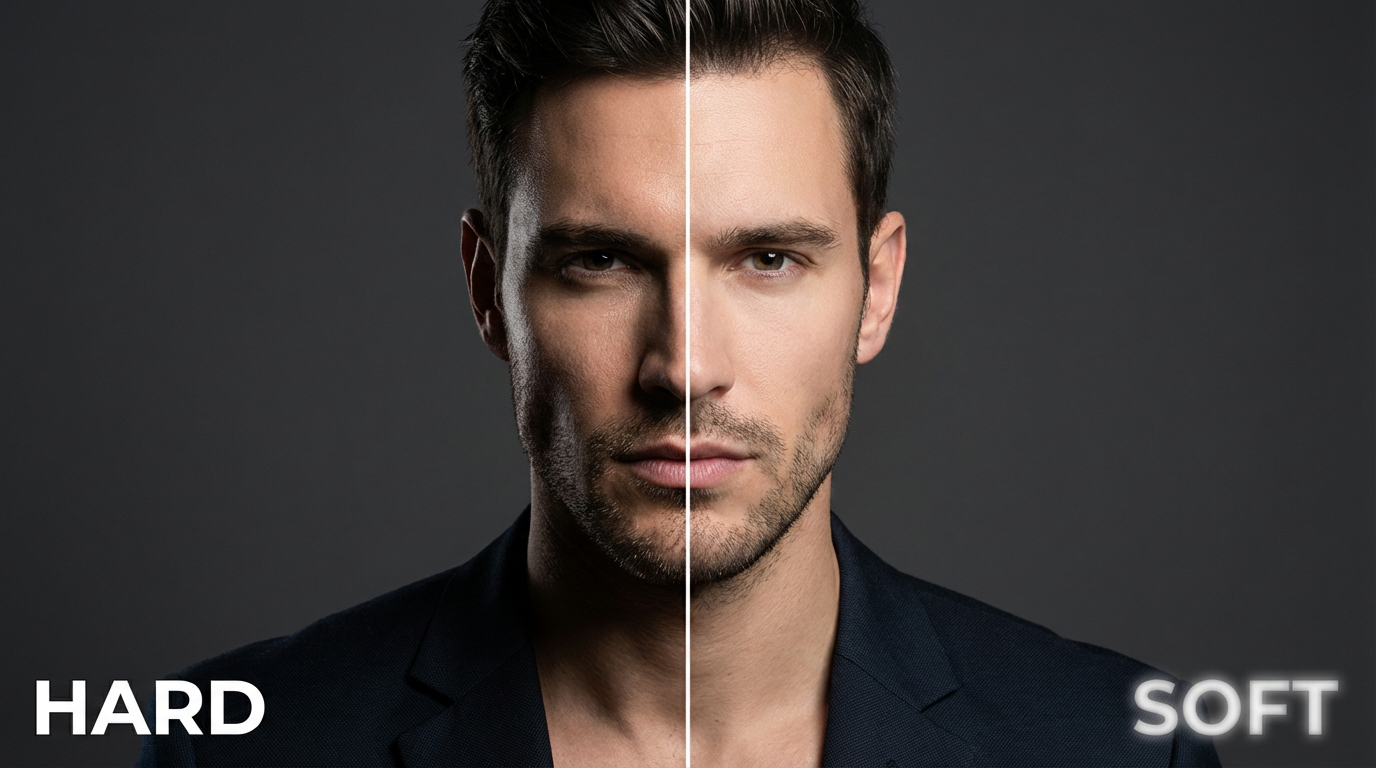 Hard Light vs. Soft Light - Created on ImagineArt
If you already have a shot but the light quality isn't working, ImagineArt AI Relight lets you switch between hard and soft light after the fact, no reshooting needed.
2. Light Direction
Where your light comes from changes everything about how a subject looks. Same person, same camera, completely different vibe just by moving the light. Here are the setups you'll actually use:
- Front lighting: Light hits the subject straight on. Eliminates shadows, creates a flat, clean look. Good for product photography and certain editorial styles.
- Side lighting: Light comes from 90 degrees to one side. Creates dramatic shadows that show texture and depth. Great for moody portraits where you want some character in the frame.
- Rembrandt lighting: A classic portrait technique where the light falls at roughly 45 degrees above and to the side, creating a small triangle of light on the shadowed cheek. One of the most recognized setups in portrait photography lighting basics and genuinely timeless.
- Butterfly lighting: Light is positioned directly in front and above the subject, creating a butterfly-shaped shadow under the nose. Very flattering for defined facial structures, very popular in old Hollywood photography for a reason.
- Backlighting: Light comes from behind the subject. Creates rim light, silhouettes, or a glowing halo effect. Tricky to expose correctly, but stunning when done right. That golden hour glow everyone chases? This is it.
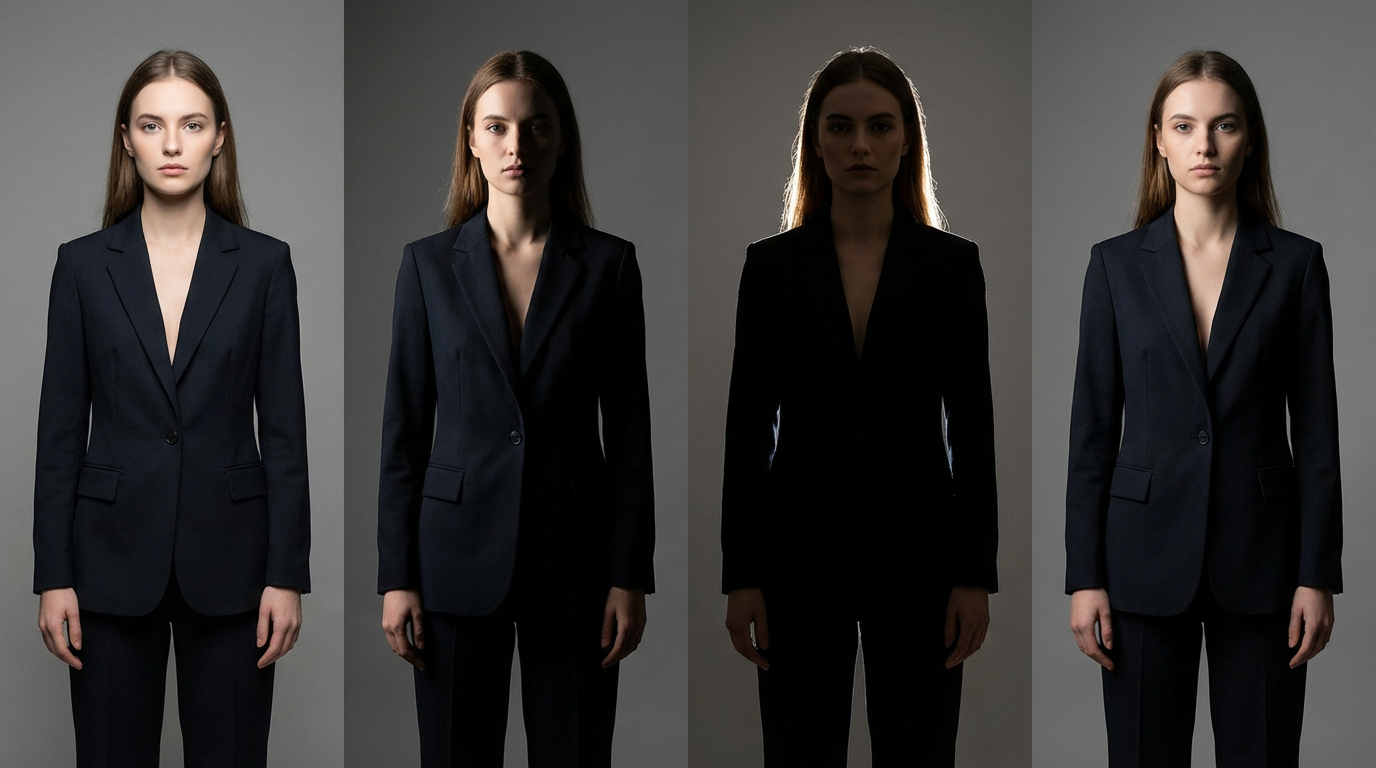 Light Direction - Created on ImagineArt
3. Color Temperature
Every light source has a color temperature measured in Kelvin (K). This is why some photos look warm and golden and others look cold and clinical, even when the exposure is correct.
- Candlelight/tungsten bulbs: 2700K (warm orange)
- Sunrise/sunset: 3200K (warm golden)
- Daylight/midday sun: 5500-6500K (neutral to cool)
- Overcast sky: 6500-7500K (cool blue)
 Color Temperature Shown via AI
Your camera's white balance setting compensates for these shifts. If you're shooting RAW, you can fix white balance in post. If you're shooting JPEG, get it right in the camera because fixing a bad color cast in JPEG is a pain you don't need in your life.
Color Temperature Shown via AI
Your camera's white balance setting compensates for these shifts. If you're shooting RAW, you can fix white balance in post. If you're shooting JPEG, get it right in the camera because fixing a bad color cast in JPEG is a pain you don't need in your life.
Natural Photography Lighting
Natural light is free, it's beautiful, and it is wildly inconsistent. Learning to work with it is one of the most valuable skills in your whole photography toolkit. For inspiration on how to use it creatively, check out our guide on AI photography prompts. Let’s begin!
4. The Golden Hour
The hour after sunrise and the hour before sunset are called the golden hour for a reason. The sun is low on the horizon, light is warm and directional, and shadows are long and soft. It's the most flattering natural light for portraits and landscapes and it photographs in a way that no studio setup can fully replicate.
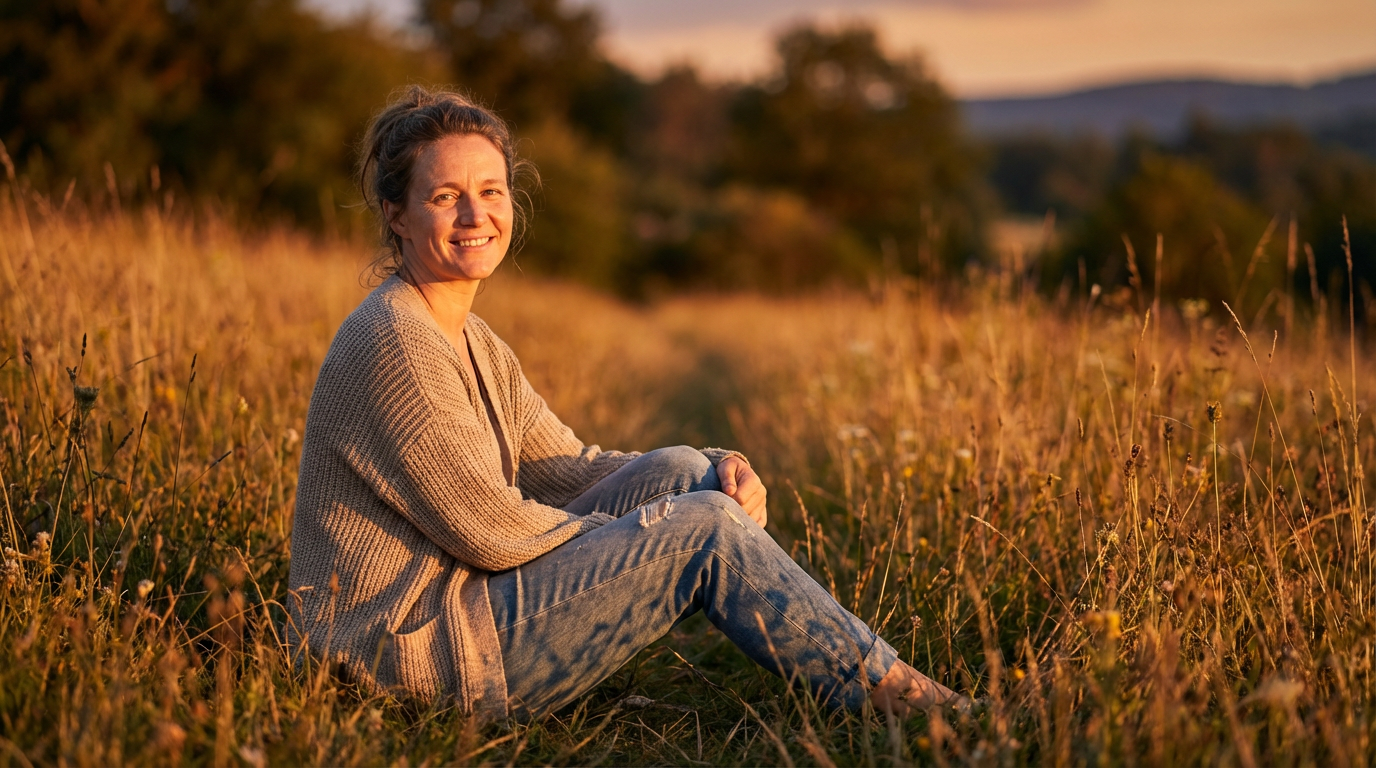 Golden Hour - Created on ImagineArt
5. The Blue Hour
Right before sunrise and right after sunset, the sky turns a deep, cool blue. There's still ambient light but no direct sun. Perfect for atmospheric cityscapes or moody outdoor portraits. Underused, underrated, genuinely beautiful.
 Blue Hour - Created on ImagineArt
6. Overcast Days Are Underrated
This is the opinion that changes how beginners shoot once they hear it. Overcast skies act like a giant softbox covering the entire sky. The light is even, diffused, and flattering. No harsh shadows, no squinting subjects. Genuinely underrated for portrait and product work. Stop waiting for sunshine.
 Overcast Day - Created on ImagineArt
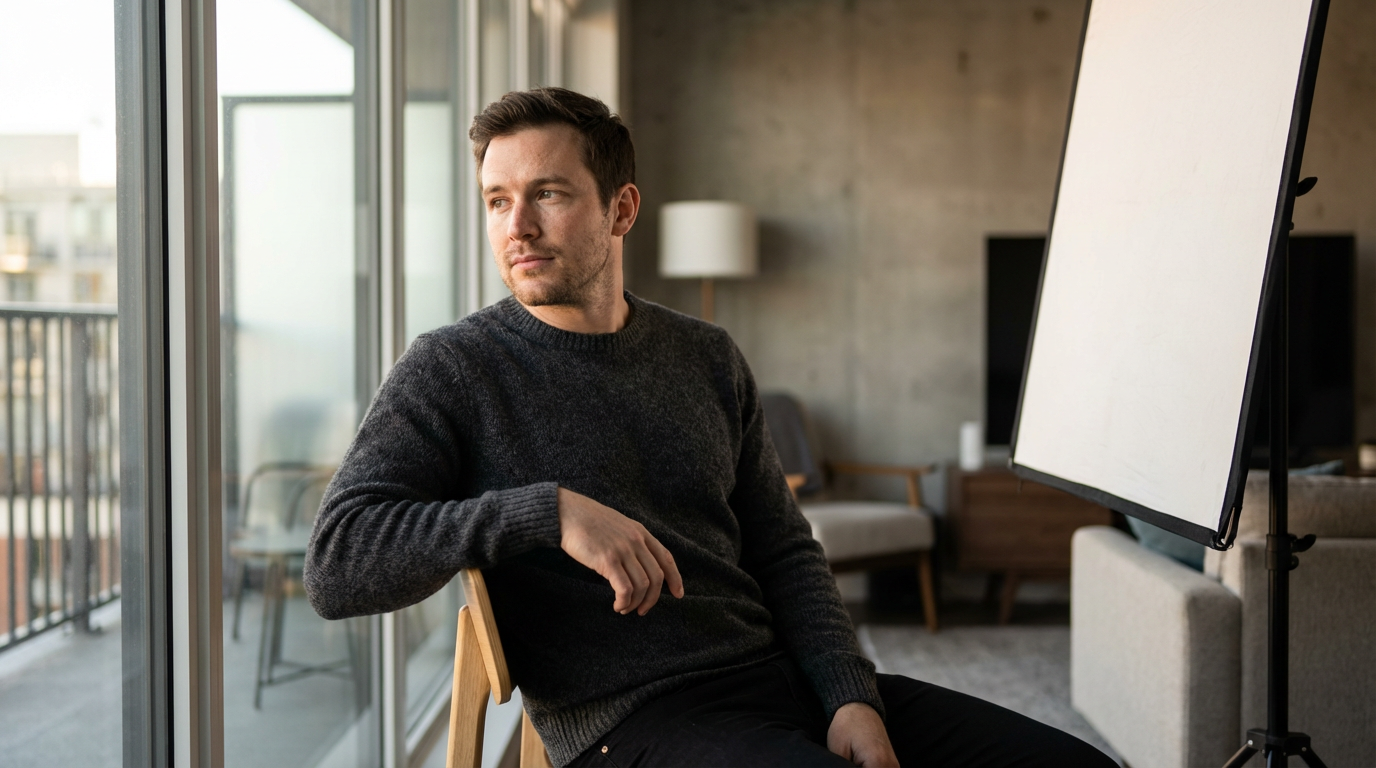
7. Window Light
Indoors, a large window is one of the best light sources available. Position your subject facing the window for soft, directional light. Use a white foam board or reflector on the opposite side to fill in shadows. This setup alone can produce professional-looking portraits with zero equipment and zero budget.
The limitation with window light is direction. You're stuck with whatever angle the sun hits your window at, and that changes by time of day and season. If you shot a great portrait but the light direction isn't quite what you wanted, ImagineArt AI Relight lets you change the lighting direction, quality, and color of the image after the fact. Shift from flat front light to dramatic side light without reshooting. Super useful when the location doesn't give you full control over where the light comes from.
 Window Light Indoors - Created on ImagineArt
Photography Studio Lighting Basics
Moving into a studio or adding artificial lights means you have complete control over every aspect of light. That control is incredible and also slightly overwhelming at first. Here's how it works.
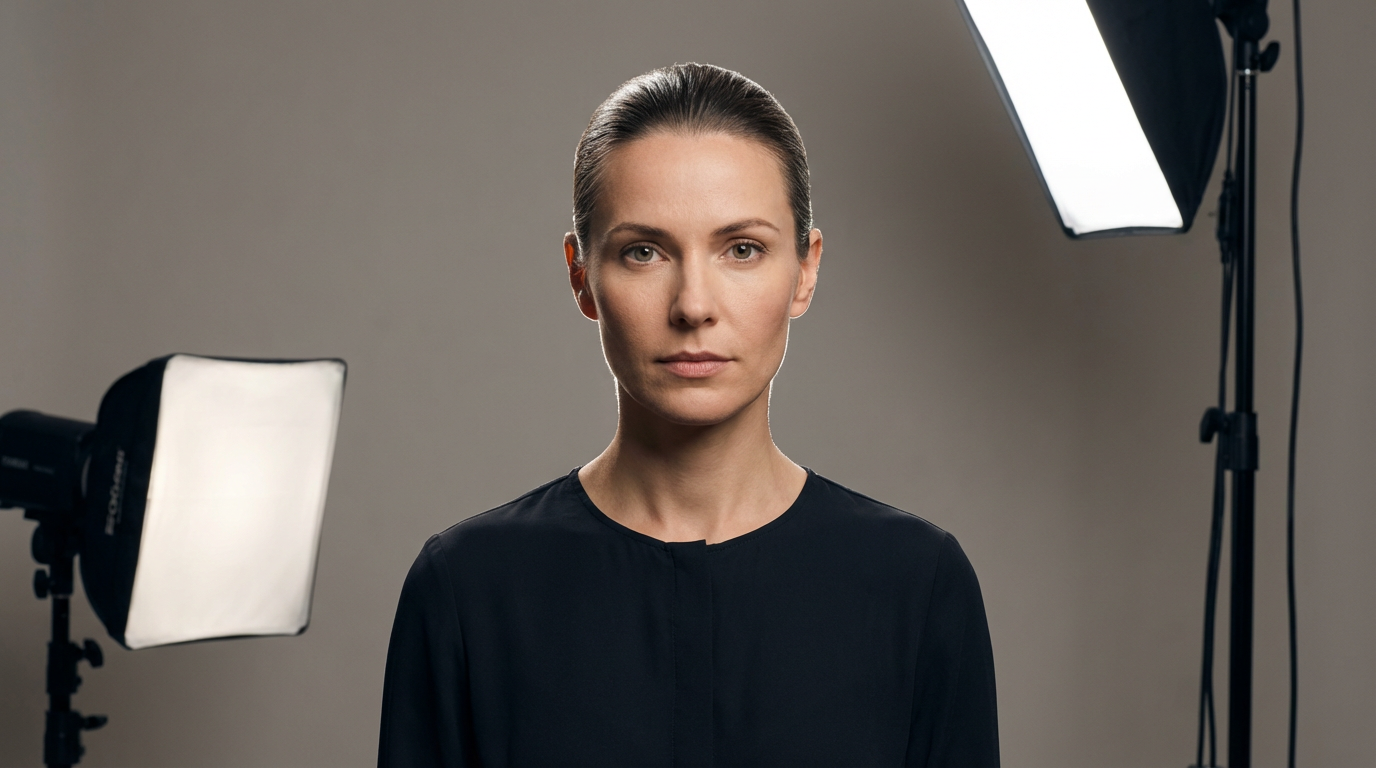
8. The Three-Point Lighting Setup
This is the foundation of photography studio lighting basics, and it applies to portraits, video, and product shoots alike. Learn this, and you have a setup that works for almost any situation.
Key light: Your main light source. Brightest and most directional. Position it at roughly 45 degrees to the side and slightly above eye level. This is the light doing the heavy lifting in your image.
Fill light: Placed on the opposite side of the key light to reduce harsh shadows. Usually dimmer than the key, often around half the power. The ratio between key and fill determines how dramatic the image looks. More fill means flatter and friendlier. Less fill means moodier and more dramatic.
Hair/rim light: Positioned behind the subject, slightly above. Separates the subject from the background and adds depth. Beginners skip this constantly and then wonder why their studio shots look flat. Don't skip the rim light.
 Three-Point Studio Lighting - Created on ImagineArt
Portrait Photography Lighting Basics
Portrait photography lighting is where most beginners start and where the most creative decisions happen. This is where understanding light stops being technical and starts being artistic.
Before diving in, you can take a look at these headshot examples to get a feel for what good portrait lighting actually looks like.
9. Match the Lighting to the Mood
Soft, low-contrast lighting works for approachable, warm portraits like lifestyle, family, and corporate headshots. High-contrast, dramatic lighting works for editorial, fashion, and character-driven portraits. Neither is objectively better. They serve completely different intentions and the skill is knowing which one fits the story you're telling.
 Portrait Mood Lighting - Created on ImagineArt
10. The Eyes Are Everything
In any portrait, make sure the eyes are sharp and well-lit. Catchlights, those small reflections of your light source in the iris, make eyes look alive and present. If there are no catchlights, the portrait looks flat and disconnected. Position your key light so it creates a catchlight in the upper portion of the eye. It's a small detail that makes a massive difference.
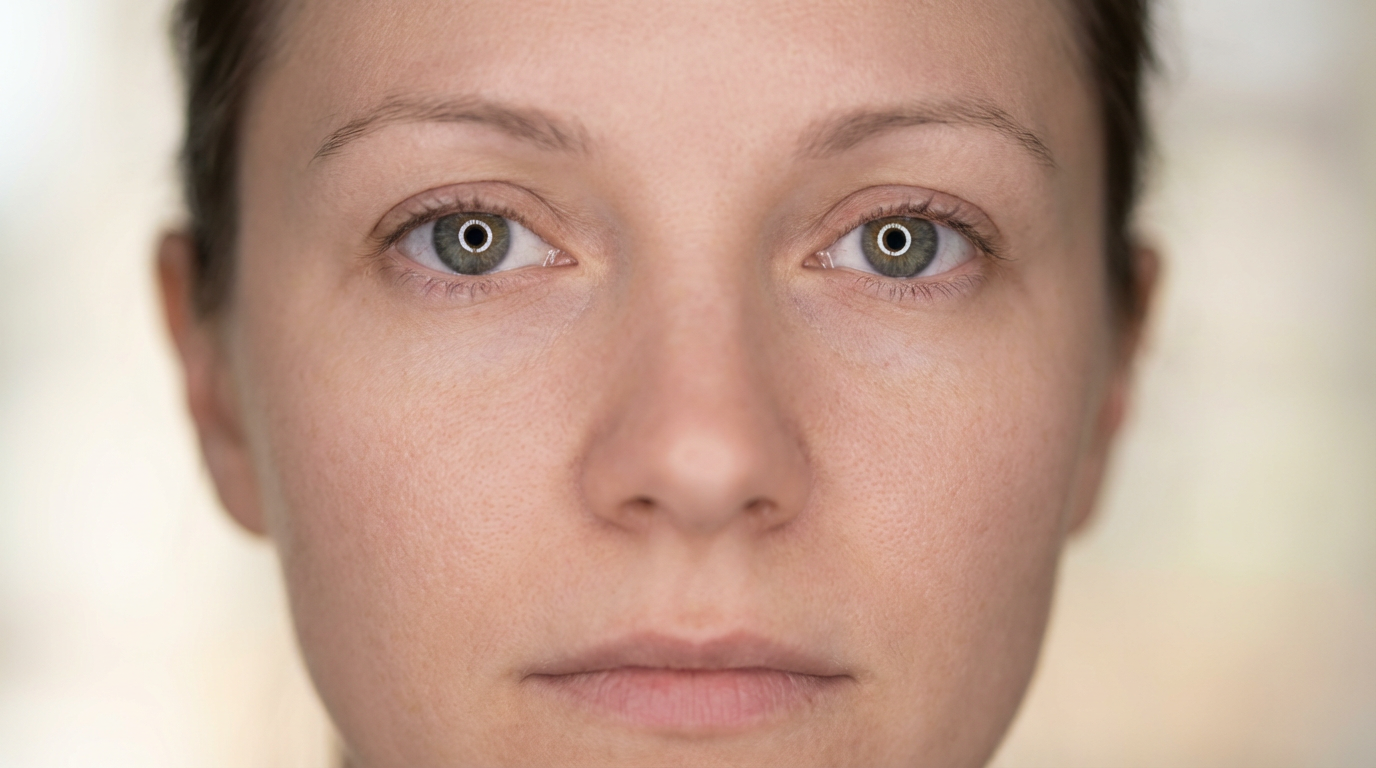 Eyes Catching Light - Created on ImagineArt
11. Skin Tones and Lighting Color
Warm light between 3200-4500K generally flatters skin tones across a wide range of complexions. Cool light can make skin look ashy or unwell unless that's the intentional aesthetic you're going for. Pay attention to the color of your light, not just its direction and quality.
12. When the Camera Angle Wasn't Right
Here's something beginners don't realize right away: the angle of the camera and the angle of the light are directly related. If you shot from a slightly unflattering angle because of how the light was positioned in the room, moving the camera changes how the shadows fall on the face. Sometimes you compromise one to get the other, and that's genuinely frustrating. ImagineArt Camera Angle lets you shift the perspective of a portrait after shooting, which means you can recover the angle you wanted without losing the lighting setup you worked hard to get right.
If you want to create perfect headshots, do check out ImagineArt AI headshot generator for quality photos.
Product Photography Lighting Basics
Product photography has one job: to make the product look so good that someone wants to buy it. Lighting is entirely how that happens.
13. Flat Lay vs. Three-Dimensional Look
Flat, even lighting minimizes texture and shadows, creating a clean, catalog-style look. This works well for clothing and flat items where clarity is the priority. If you want to show texture and dimension, like with jewelry, food, or skincare, you need directional light with intentional shadows. Side or back lighting at low angles brings out surface detail in a way that flat lighting never will.
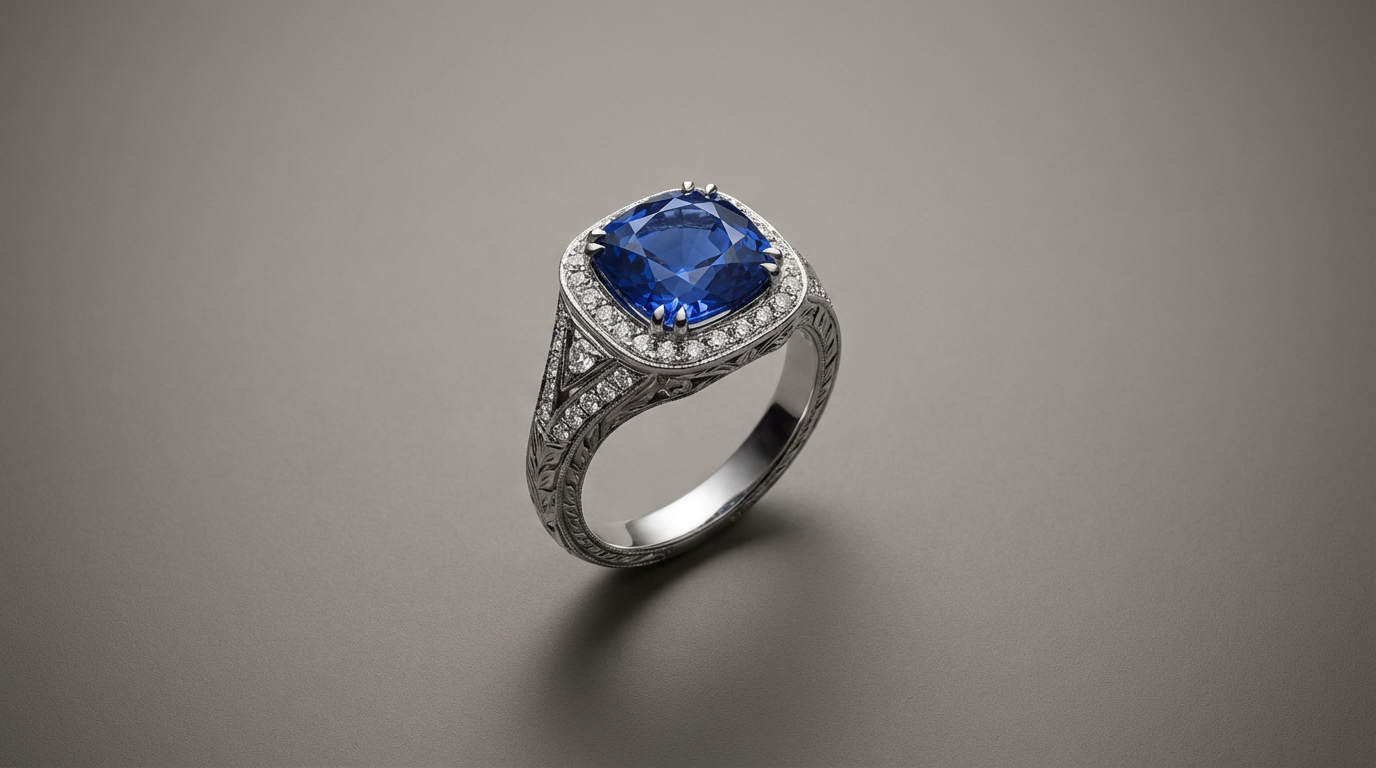 Product Photography - Created on ImagineArt
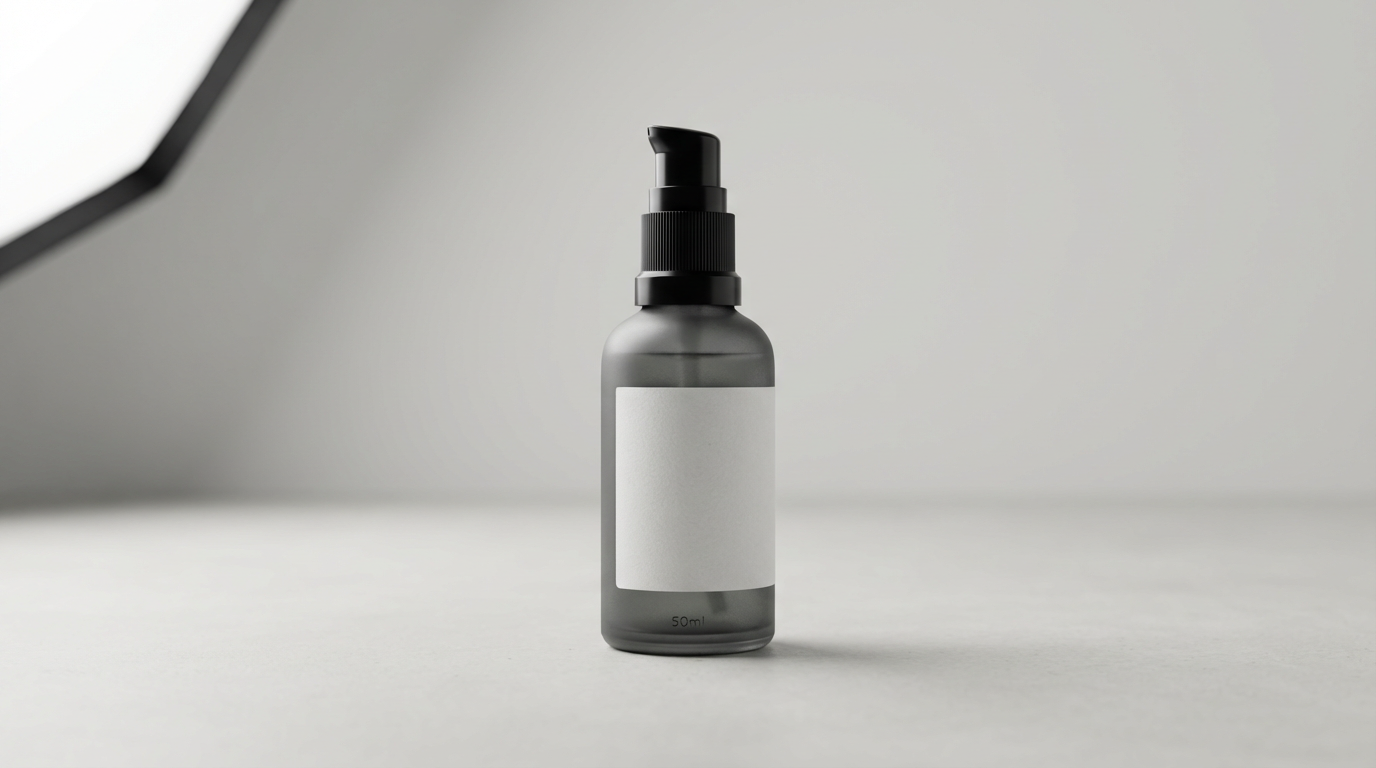
14. White Background Product Shots
The classic e-commerce look requires a clean white background with the product properly exposed. The challenge is keeping the background pure white without overexposing the product itself. A common approach is to light the background separately from the product using additional lights aimed at the background while keeping your product lights controlled and independent.
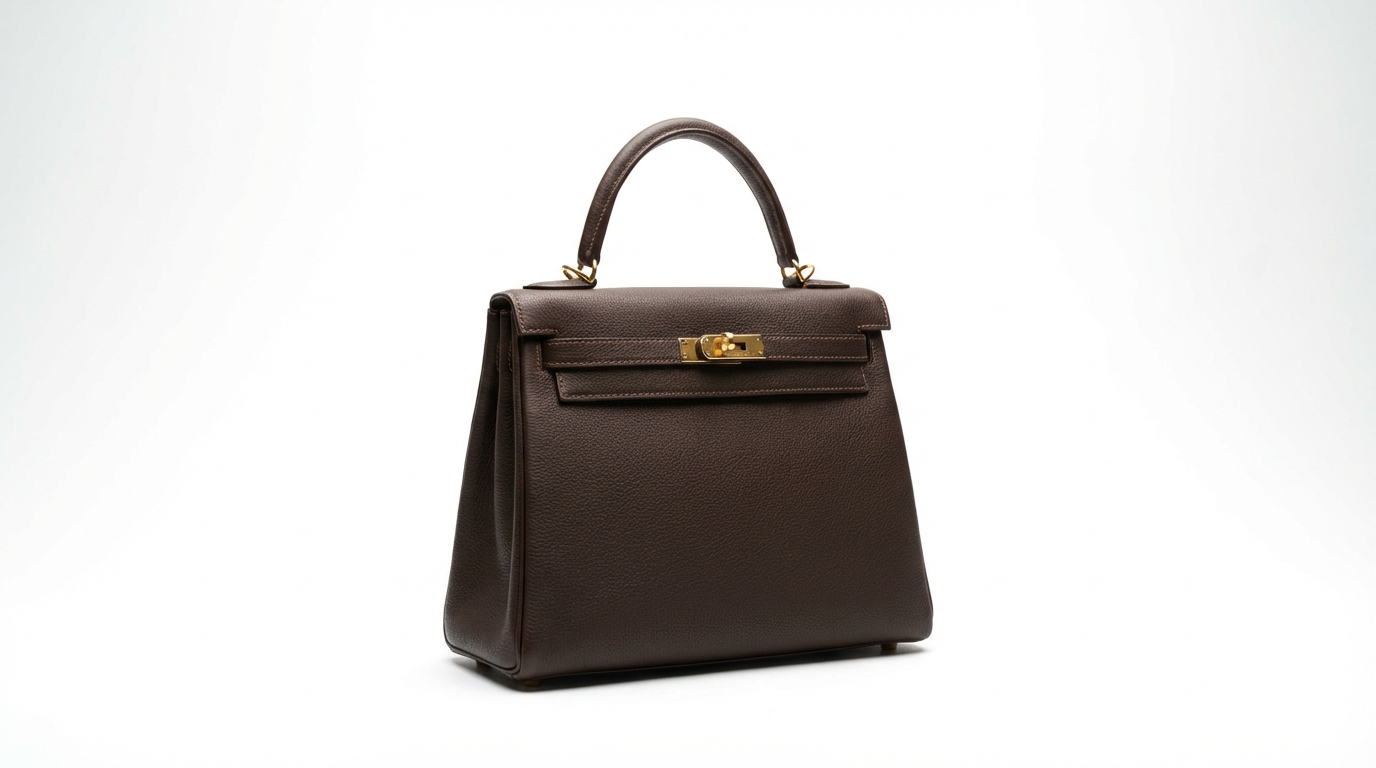 Product on White Background - Created on ImagineArt
If you have a perfect shoot but the background needs changing, instead of reshooting the whole thing, you can try ImagineArt Background Changer for instant results.
For teams working on early-stage marketing or product mockups where a full studio shoot isn't practical yet, ImagineArt AI Product Photography generates professional product images in different settings without the overhead of a physical setup. It's particularly useful when you have a lot of SKUs and limited time and budget.
15. Reflections and Glare on Shiny Products
Shiny products like glass, metal, and screens are notoriously difficult, and every product photographer has a horror story. Use a polarizing filter to reduce glare. Tent your product inside a diffusion setup using translucent white fabric or paper wrapped around the product to create even, reflection-free light from all sides. Feather your softbox slightly so the edge of the light, not the center, hits the surface. This reduces hotspots significantly and saves you hours of editing.
 Reflections & Glare Control - Created on ImagineArt
5 Common Lighting Mistakes Beginners Make
Shooting in mixed lighting
When you have daylight from a window and a tungsten lamp in the same frame, your camera can't correctly white balance for both. The result is mismatched color casts that are genuinely difficult to fix in post. Pick one dominant light source and commit.
Ignoring the background
Your background is lit too. A dark subject against a dark background just disappears. Use rim lights or separate background lights to create separation and make your subject actually pop.
Too much fill
Beginners fill in all their shadows because shadows look harsh on screen. But shadows are what create dimension. A ratio of roughly 2:1 or 3:1 (key to fill) almost always looks more professional than fully-filled, flat light.
Not shooting in RAW
RAW files give you far more latitude to fix white balance, recover blown highlights, and lift crushed shadows in post. If you're still learning lighting, shoot RAW so your mistakes are recoverable instead of permanent.
Printing without upscaling
This isn't a lighting mistake exactly but it's where great lighting work gets quietly destroyed. If you're printing or enlarging images, compression and resizing kill detail fast. Running your shots through ImagineArt AI image upscaler before export preserves the sharpness and texture that your lighting worked hard to create in the first place.
Lighting Setups and AI Tools by Use Case
Every shoot has the right lighting setup and the right AI tool. Use this table as your cheat sheet:
| Use Case | Light Quality | Direction | Color Temp | |
|---|---|---|---|---|
| Corporate headshots | Soft | Front or 45 degrees | Neutral (5000 to 5500K) | AI Headshot Generator |
| Editorial portraits | Hard or mixed | Side or Rembrandt | Varies by mood | AI Relight |
| E commerce products | Soft, even | Front or top | Neutral to cool | AI Product Photography |
| Food photography | Soft, directional | Side or back | Warm (3500 to 4500K) | Background Changer |
| Landscape | Natural (golden hour) | Low angle | Warm | AI Relight |
| Real estate | Mixed (daylight and fill) | All directions | Balanced | AI Image Upscaler |
Final Thoughts
The basics of photography lighting aren't a checklist you finish and move on from. They're concepts you keep applying, refining, and combining in new ways. Every shoot teaches you something different about how light behaves and what you can do with it.
Start simple: one window, one subject, one reflector. Understand what changes when you move the light closer, further, higher, or to the side. Once those fundamentals click, everything else, including studio setups, complex modifiers, and AI-enhanced workflows, starts to make a lot more sense.
Photographers who deeply understand light are also the ones who get the most out of AI tools, because they know what good looks like. That's the standard worth chasing.
Commonly Asked Questions
What is the best lighting for beginner photographers?
Window light is the best starting point for anyone learning photography lighting basics. It is soft, directional, and completely free. Pair it with a white foam board on the shadow side and you have a portrait setup that rivals a basic studio without spending a cent.
Is it right to use AI to improve your photos?
Yes, AI photo editing tools are a practical part of modern photography workflows. Whether you are fixing lighting, swapping backgrounds, or upscaling for print, these tools save time without compromising quality. The key is understanding the basics first so you can judge whether the output actually looks right.
What is the golden hour, and why does it matter?
Golden hour is the first hour after sunrise and the last hour before sunset, when the sun sits low and produces warm, directional light with long, soft shadows. It is the most flattering natural light available and a core concept in photography lighting basics. Landscape and portrait photographers often plan shoots around it.
What color temperature works best for portraits?
Warm to neutral temperatures between 3500K and 5500K are the most flattering for portrait photography. Tones around 3500K to 4500K add warmth and life to skin without looking overly orange. Temperatures above 6000K can feel more editorial but require careful handling to avoid making skin appear flat.
Can AI tools actually fix bad lighting in photos?
Yes, AI relighting tools can change the direction, quality, and color of light in a photo after it has already been taken. ImagineArt AI Relight tool, for example, lets you apply dramatic side lighting or shift the overall mood of a flatly lit image in seconds. Understanding lighting fundamentals still matters so you can judge whether the result looks realistic.
Do I need expensive gear to learn lighting?
No, the fundamentals of photography lighting are about understanding how light behaves, not how much you spend. A window and a white foam board can produce professional results. Equipment like softboxes and strobes help refine control, but they build on knowledge rather than replace it.
Aqsa Nazir Kayani
Aqsa Nazir Kayani specializes in SaaS and Gen AI, delivering search-optimized content that boosts visibility and strengthens brand authority.